Trial Quick Start Guide
1. Using the Gloves
1.1 Power On and Connect
On the computer, double-click the Forsense HumanHand executable in the software root directory. If the software is not installed, install it first. Keep HumanHand running during all later steps; otherwise the PC cannot receive glove data.
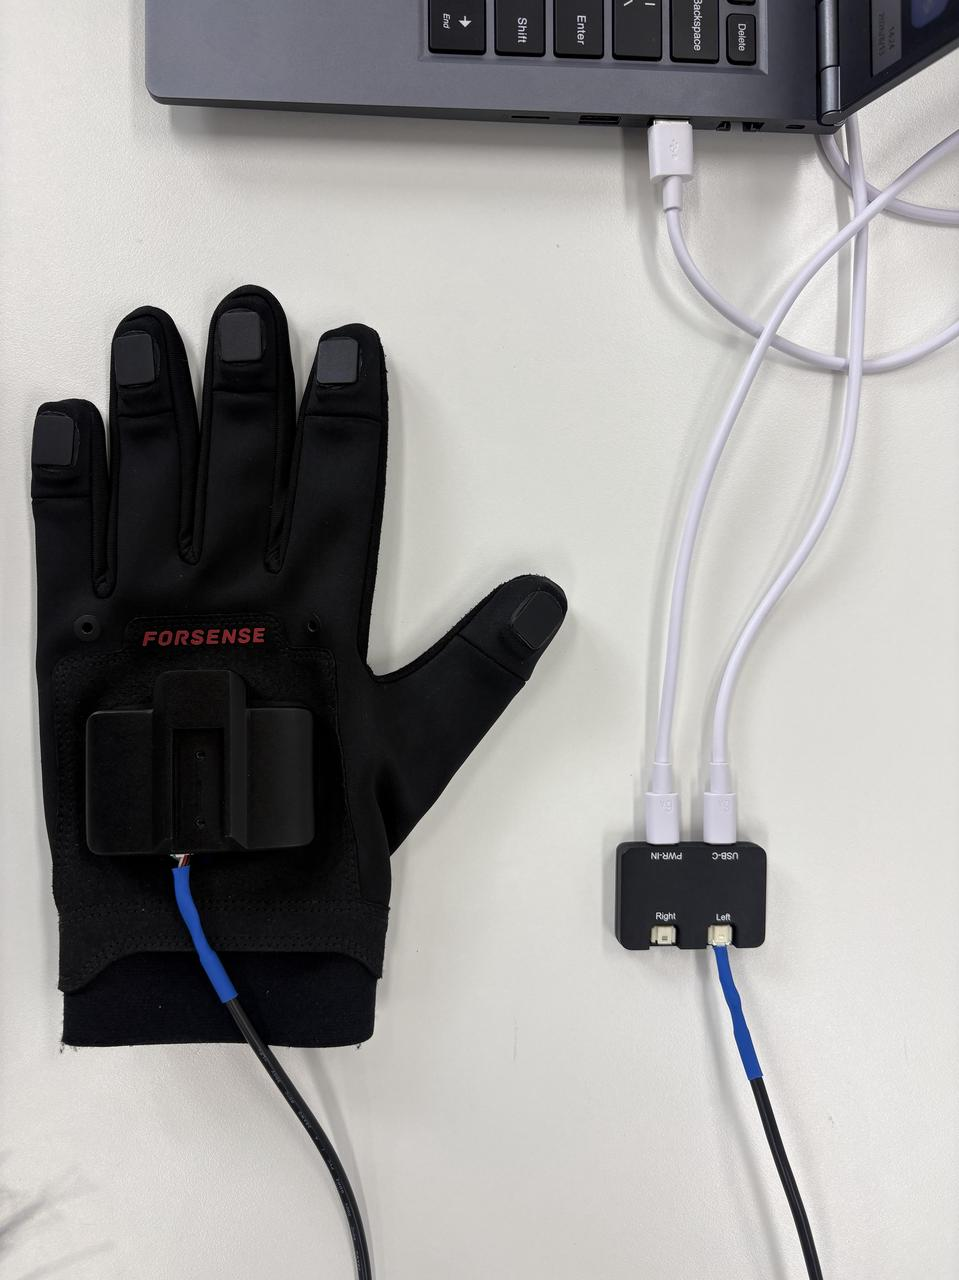
Plug the left and right glove cables into the Hub ports labeled Right and Left. Use a USB-to-Type-C data cable: insert the USB end into a computer USB port or USB dock, and the Type-C end into the Hub USB-C port. Then connect power to the Hub PWR-IN port. Check the port labels to avoid swapping connections.
The software and gloves may be started in either order. HumanHand can discover the gloves only after they have powered on correctly.
1.2 Power On and Connect a Data-Box Glove
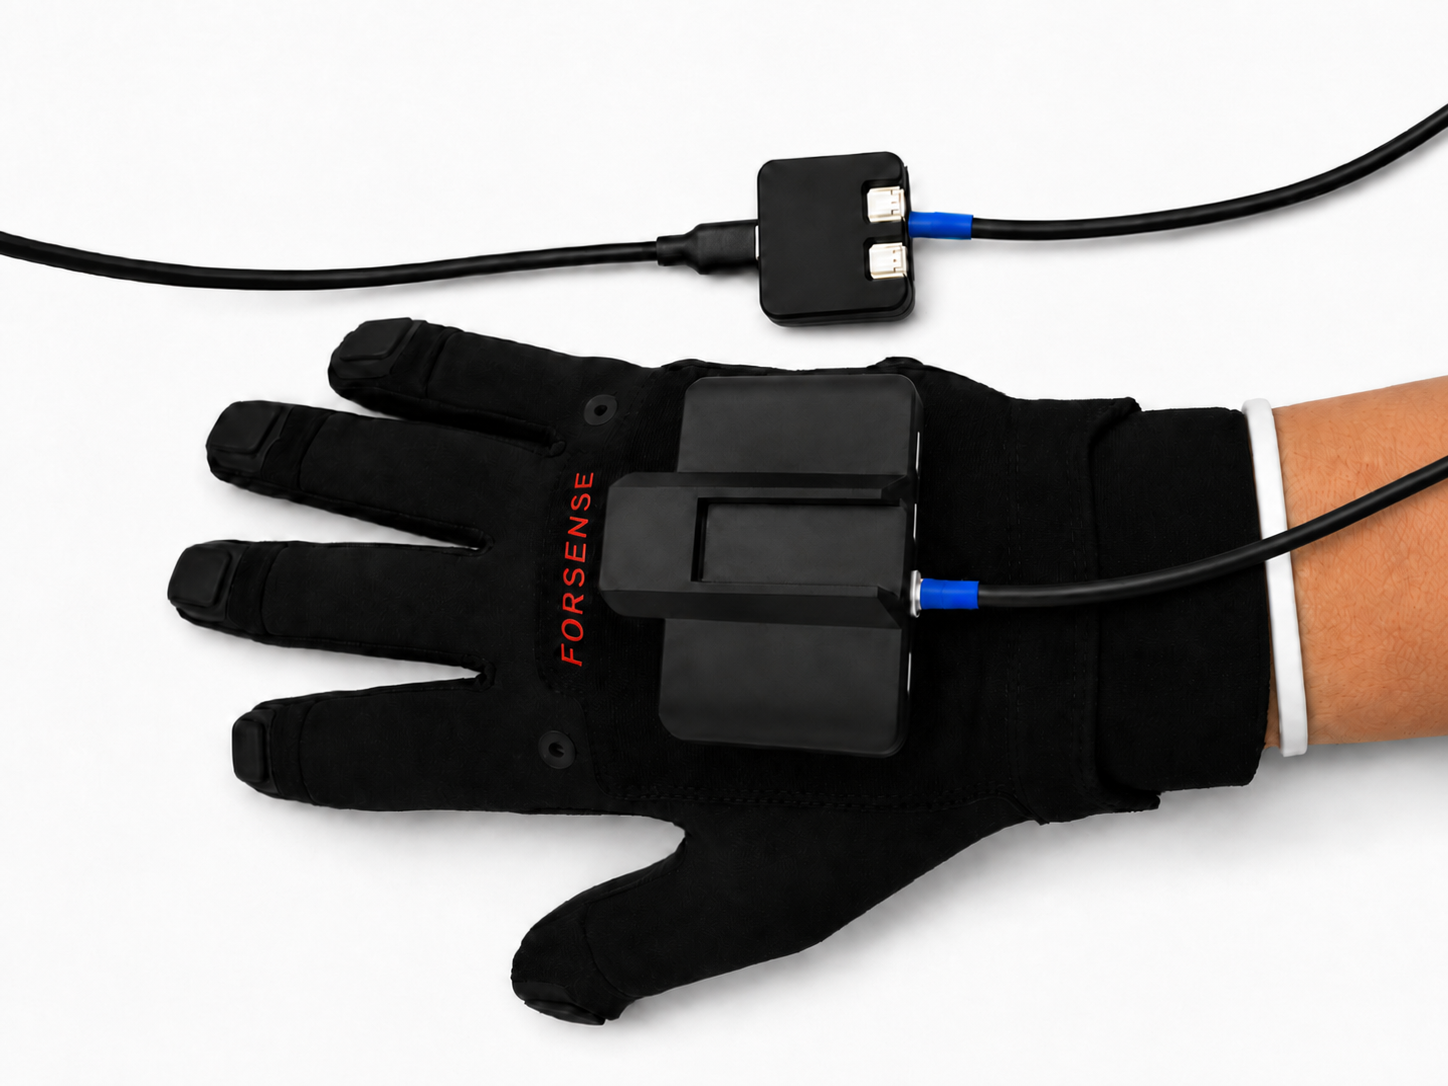
- Plug the USB-to-Type-C cable into a computer USB port. Solid blue (one hand) or solid green (both hands) means the glove has powered on successfully.
1.3 Glove LED States
G7 LED states
| LED behavior | G7 glove status |
|---|---|
| Blue, slow flash | Starting / initializing |
| Solid blue | One glove is operating normally |
| Blue, fast flash | Firmware upgrade in progress |
| Solid red | Hardware fault (for example IMU self-test failure) |
| Red, slow flash | Critical warning (for example a disconnected finger) |
| Red, fast flash | Warning (for example missing calibration parameters, or calibration CRC failure) |
| Solid green | Left/right synchronization is valid and both gloves are operating normally |
2. Using Forsense HumanHand
2.1 Host Software
ForMotion Glove G7 software and firmware packages
2.2 Glove Operation
Procedure
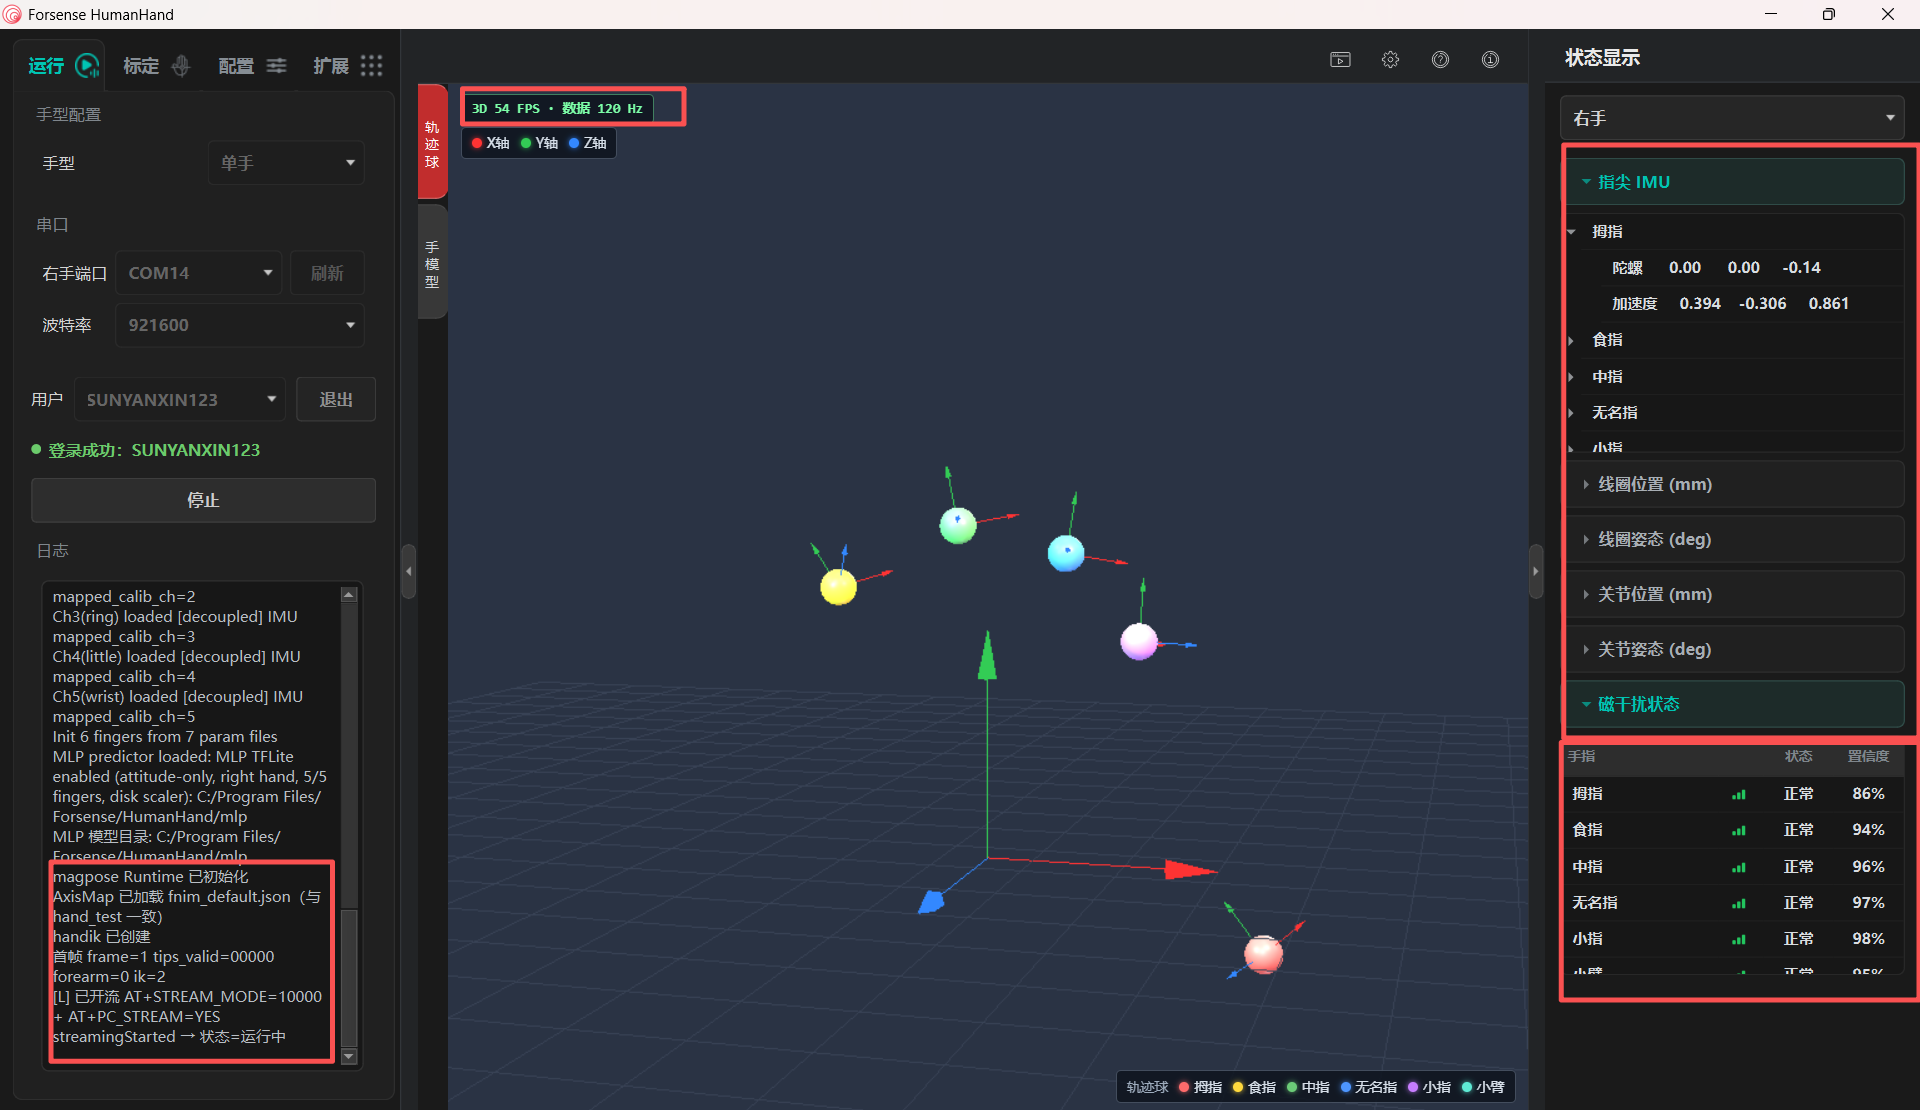
- As shown in Figure 1, connect the Type-C cable to the Hub port on the back of the glove.
- Select single-hand or two-hand glove type, choose the serial port, set the baud rate to 912600, enter any user name, click Register, then click Start.
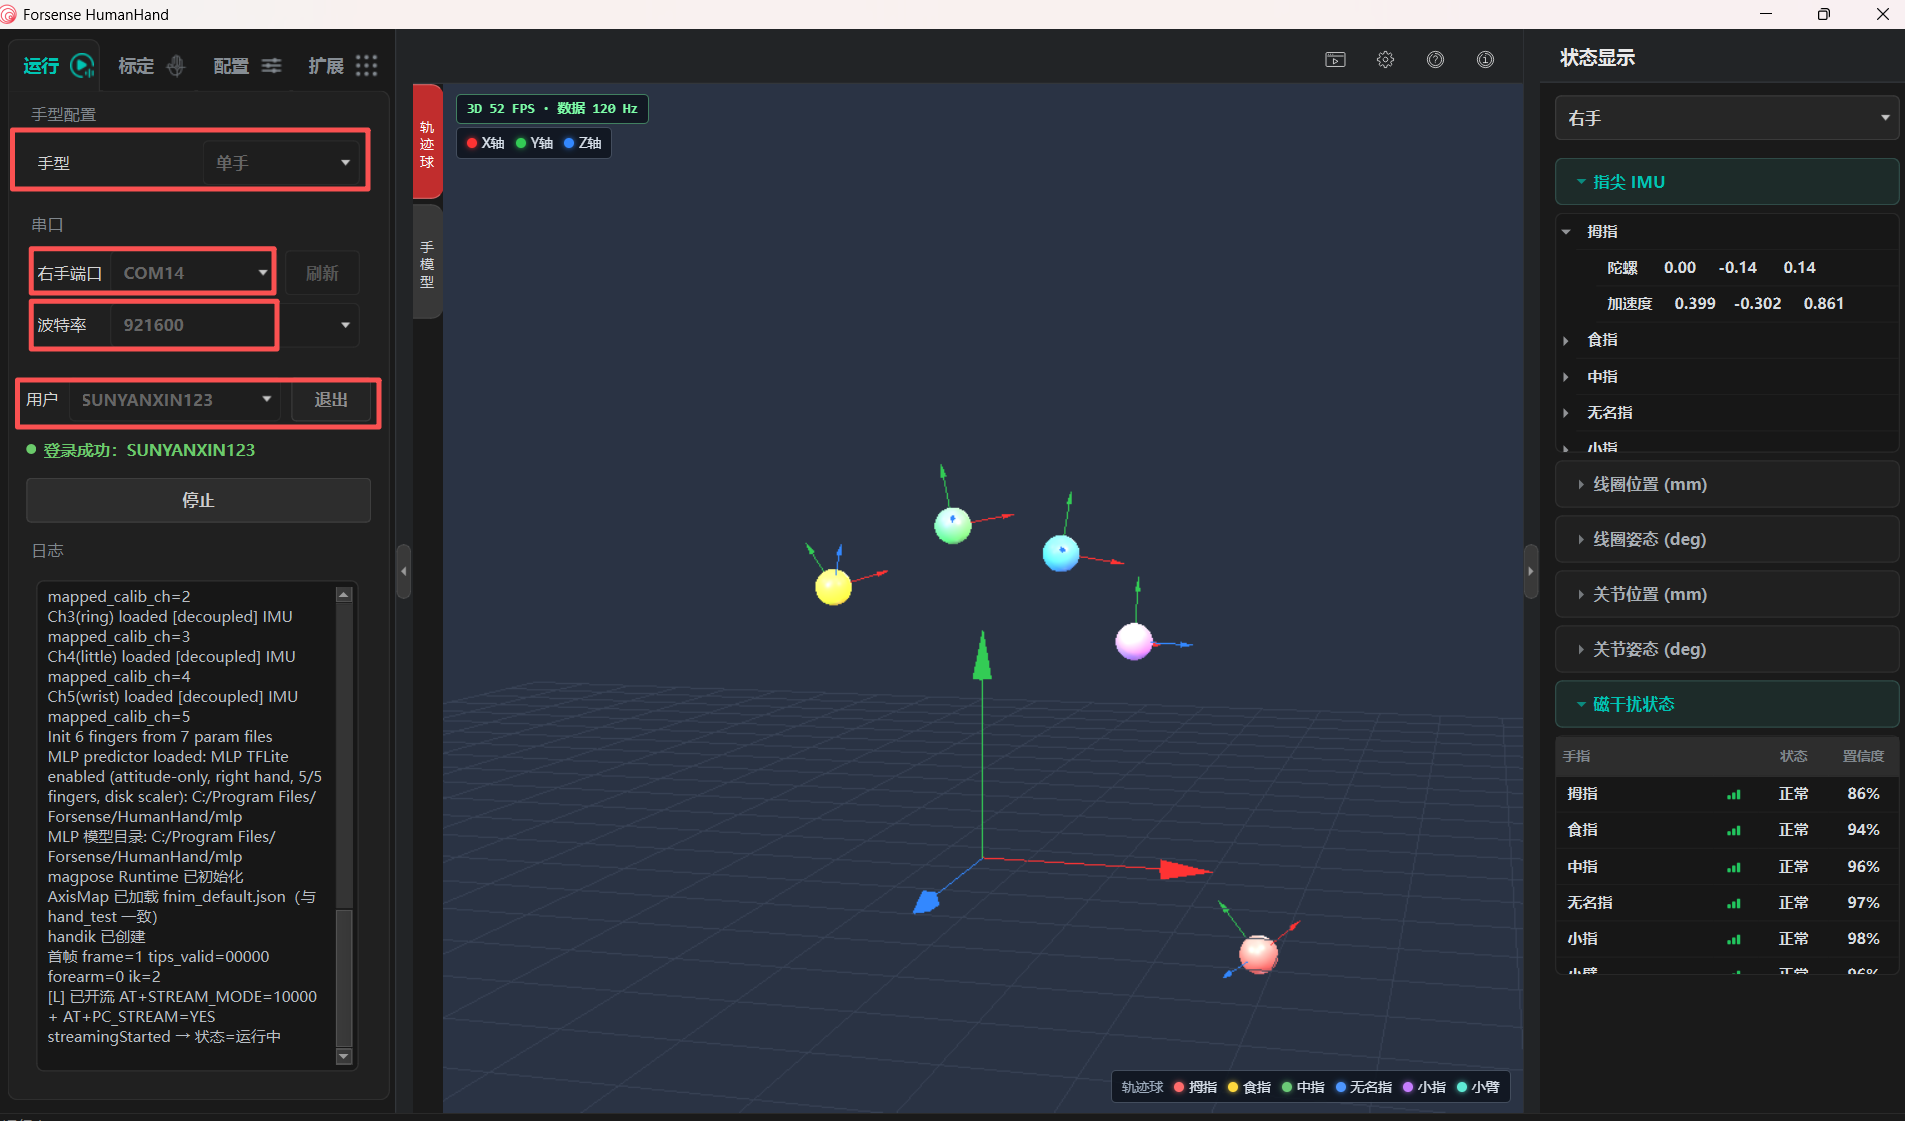
- Changing data indicates a successful connection.
2.3 Motion Calibration
This section uses one pair of gloves as the example. The procedure is the same for multiple pairs.
2.3.1 Motion Calibration
Complete motion calibration before displaying or recording motion. Follow the on-screen pose prompts. After a successful calibration, the hand model can be driven and motion can be recorded.
Calibration can be performed after a single glove is connected.
Calibration results can be reused. After restarting the software, the user can choose whether to calibrate again.
2.3.1.1 Procedure
Calibrate in HumanHand as follows (during calibration, keep the palm facing down and do not point the palm toward yourself. Reach the limit of each pose without forcing it. For example, close the fist as fully as possible; keep the fingers together when they should be together; spread them to the maximum when opening the hand.):
Put the glove on correctly, and confirm that the receiver and glove are both powered on.
Connect at least one glove. Then click Left or Right Hand Calibration, followed by Hand Pinch Calibration, according to the connected gloves.
Follow the on-screen illustrations to complete 7 calibration poses. Each pose lasts about 3 seconds. Watch the progress view on the right, and change pose only after that view advances to the next action.
If calibration fails because of an interruption, repeat the steps above.
After calibration succeeds, an unexpected disconnect does not require recalibration after reconnecting.
If a glove does not take part in calibration, its model stays in the initial undriven state after calibration.
2.3.1.2 Interface
- Interface after a successful connection:
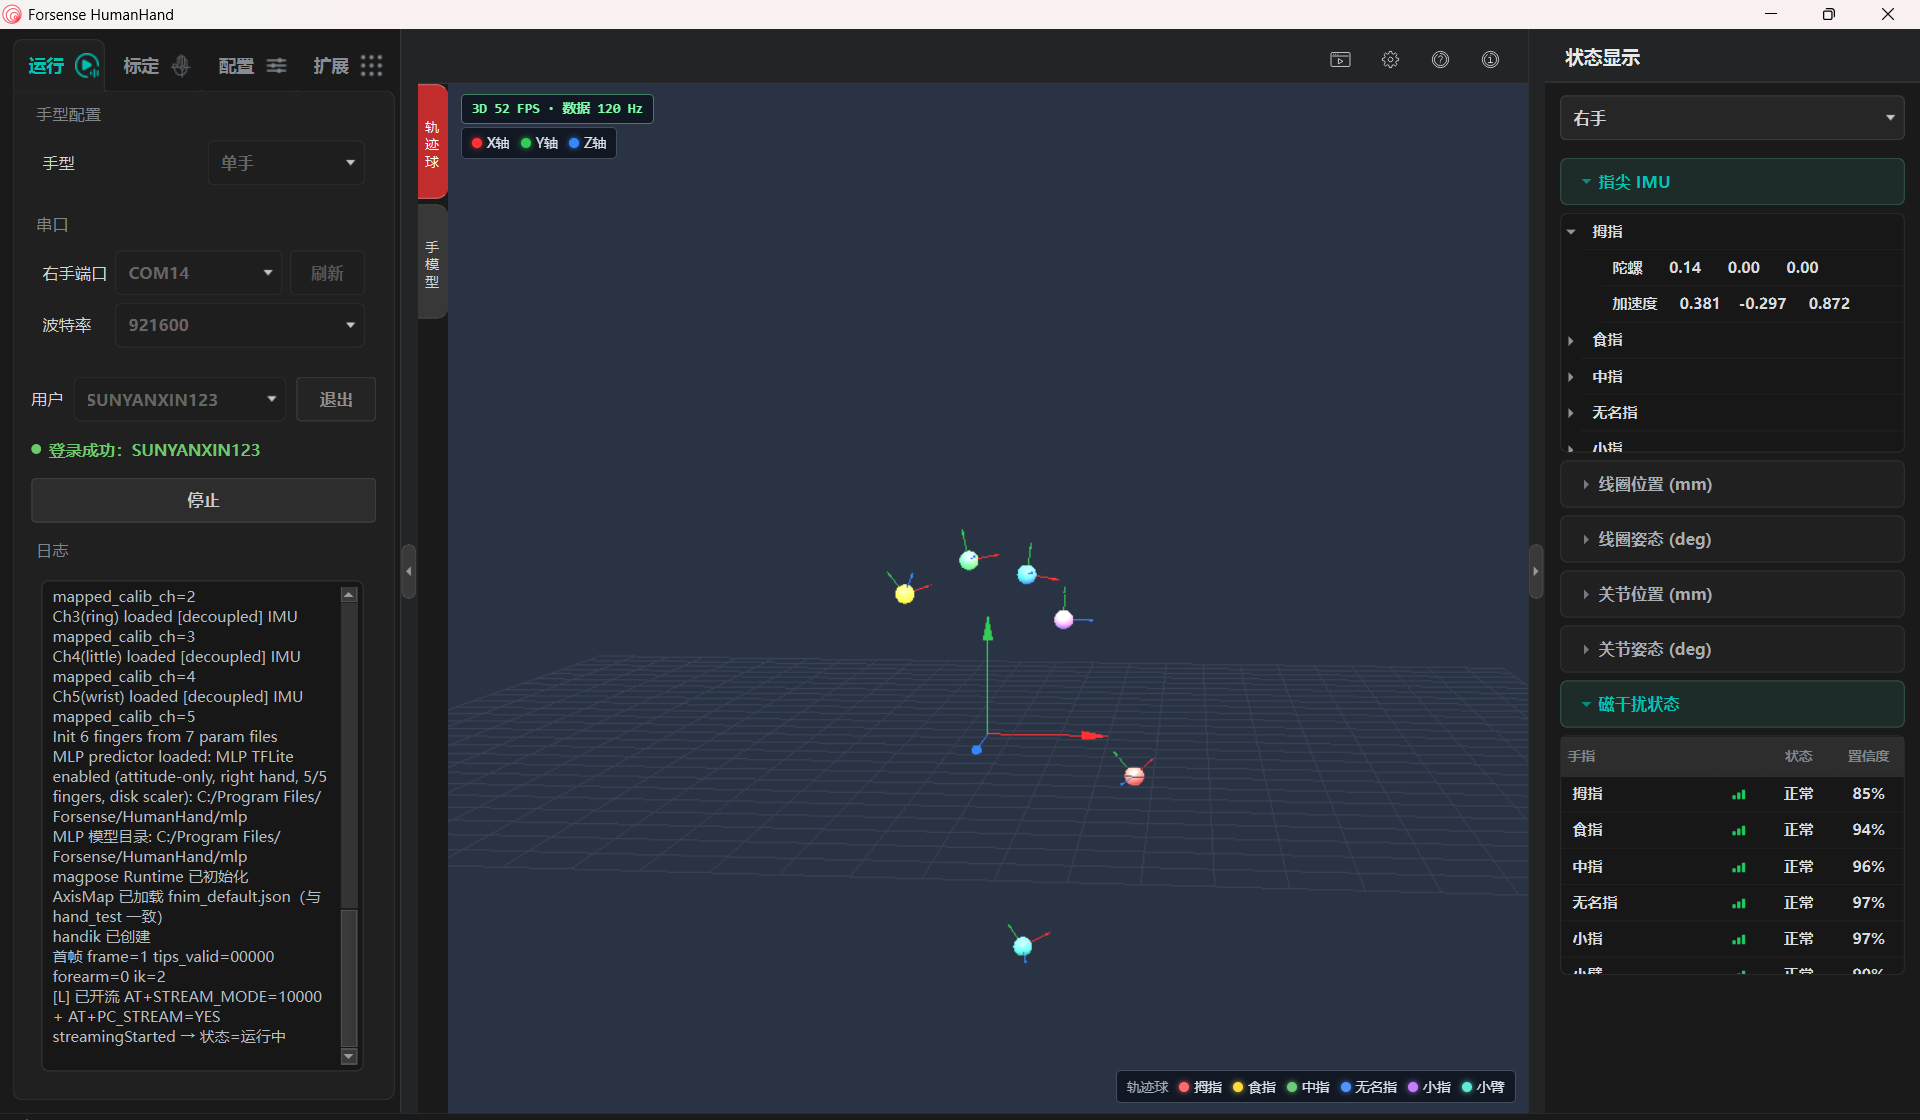
- After a successful connection, click Calibration to start the first motion calibration:
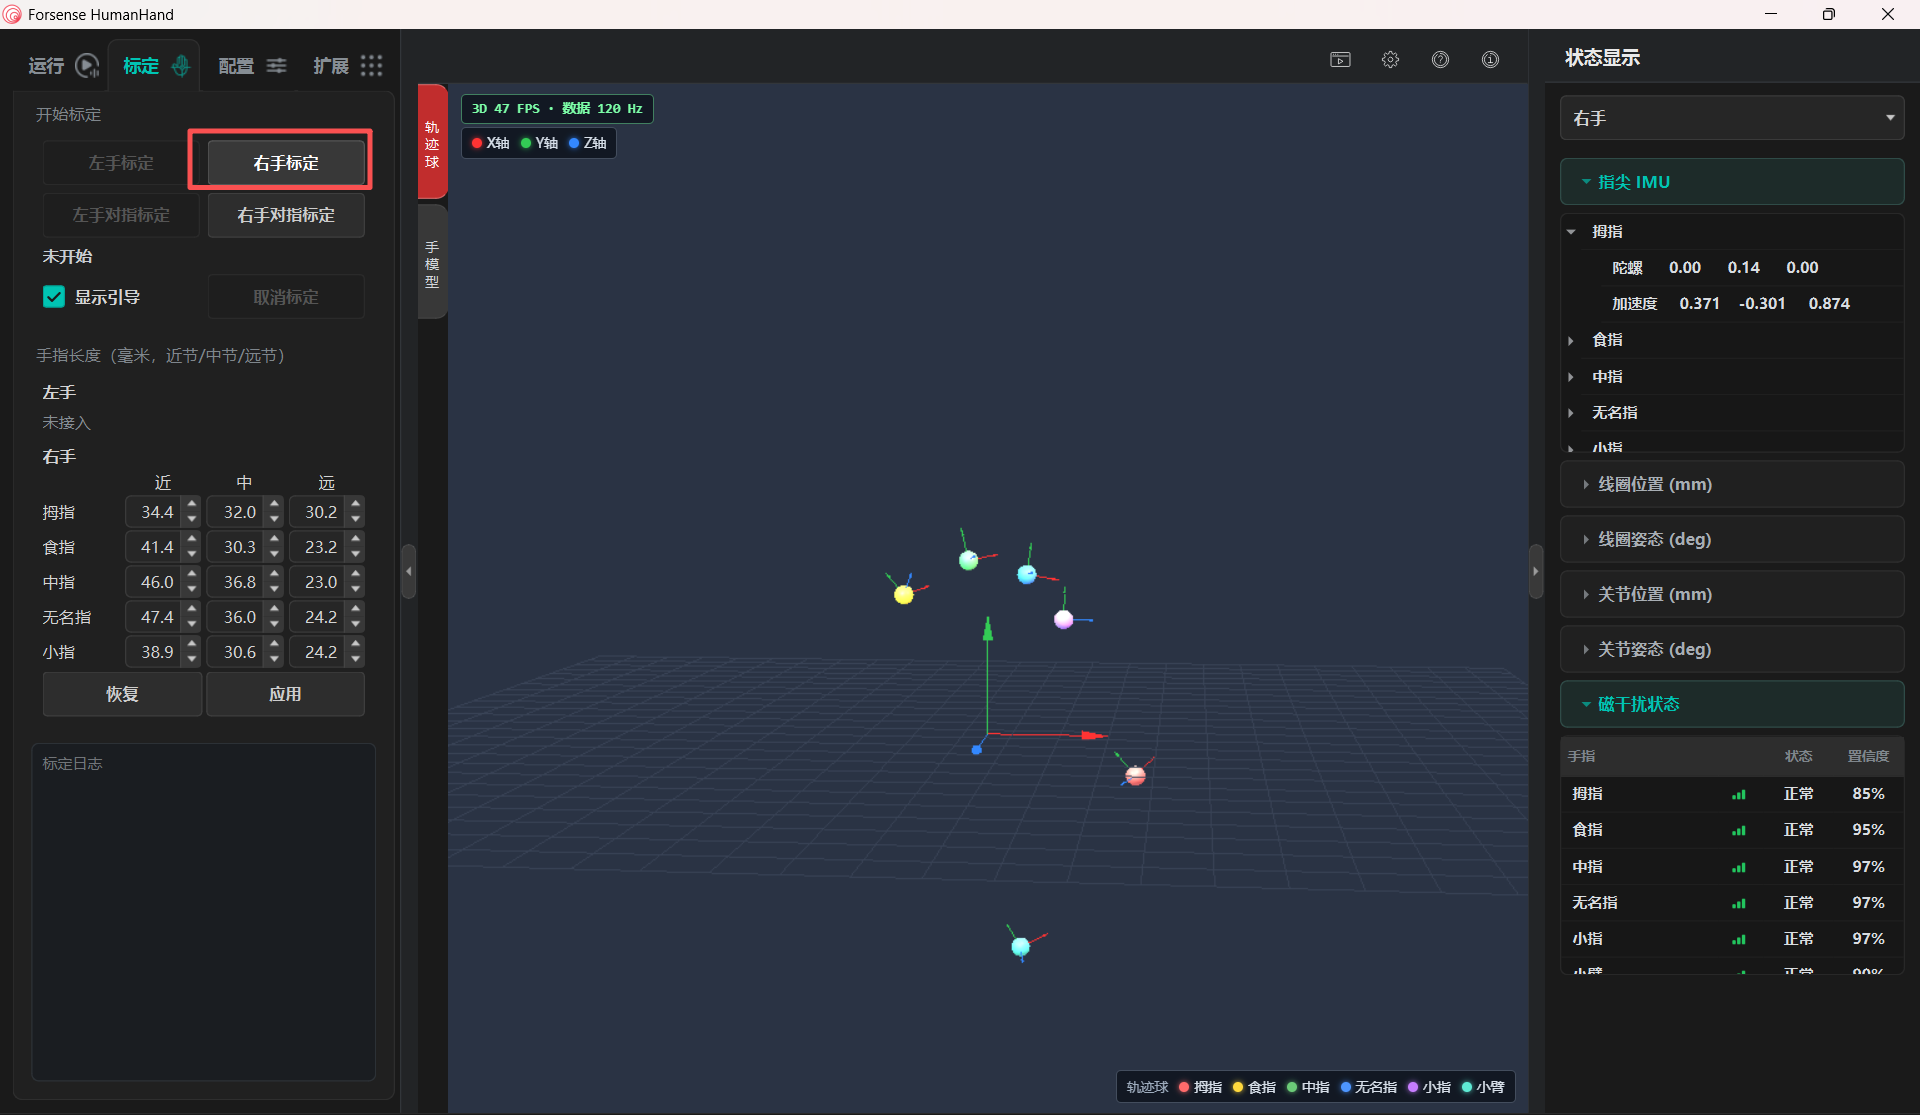
- Follow the illustrated prompts to calibrate:
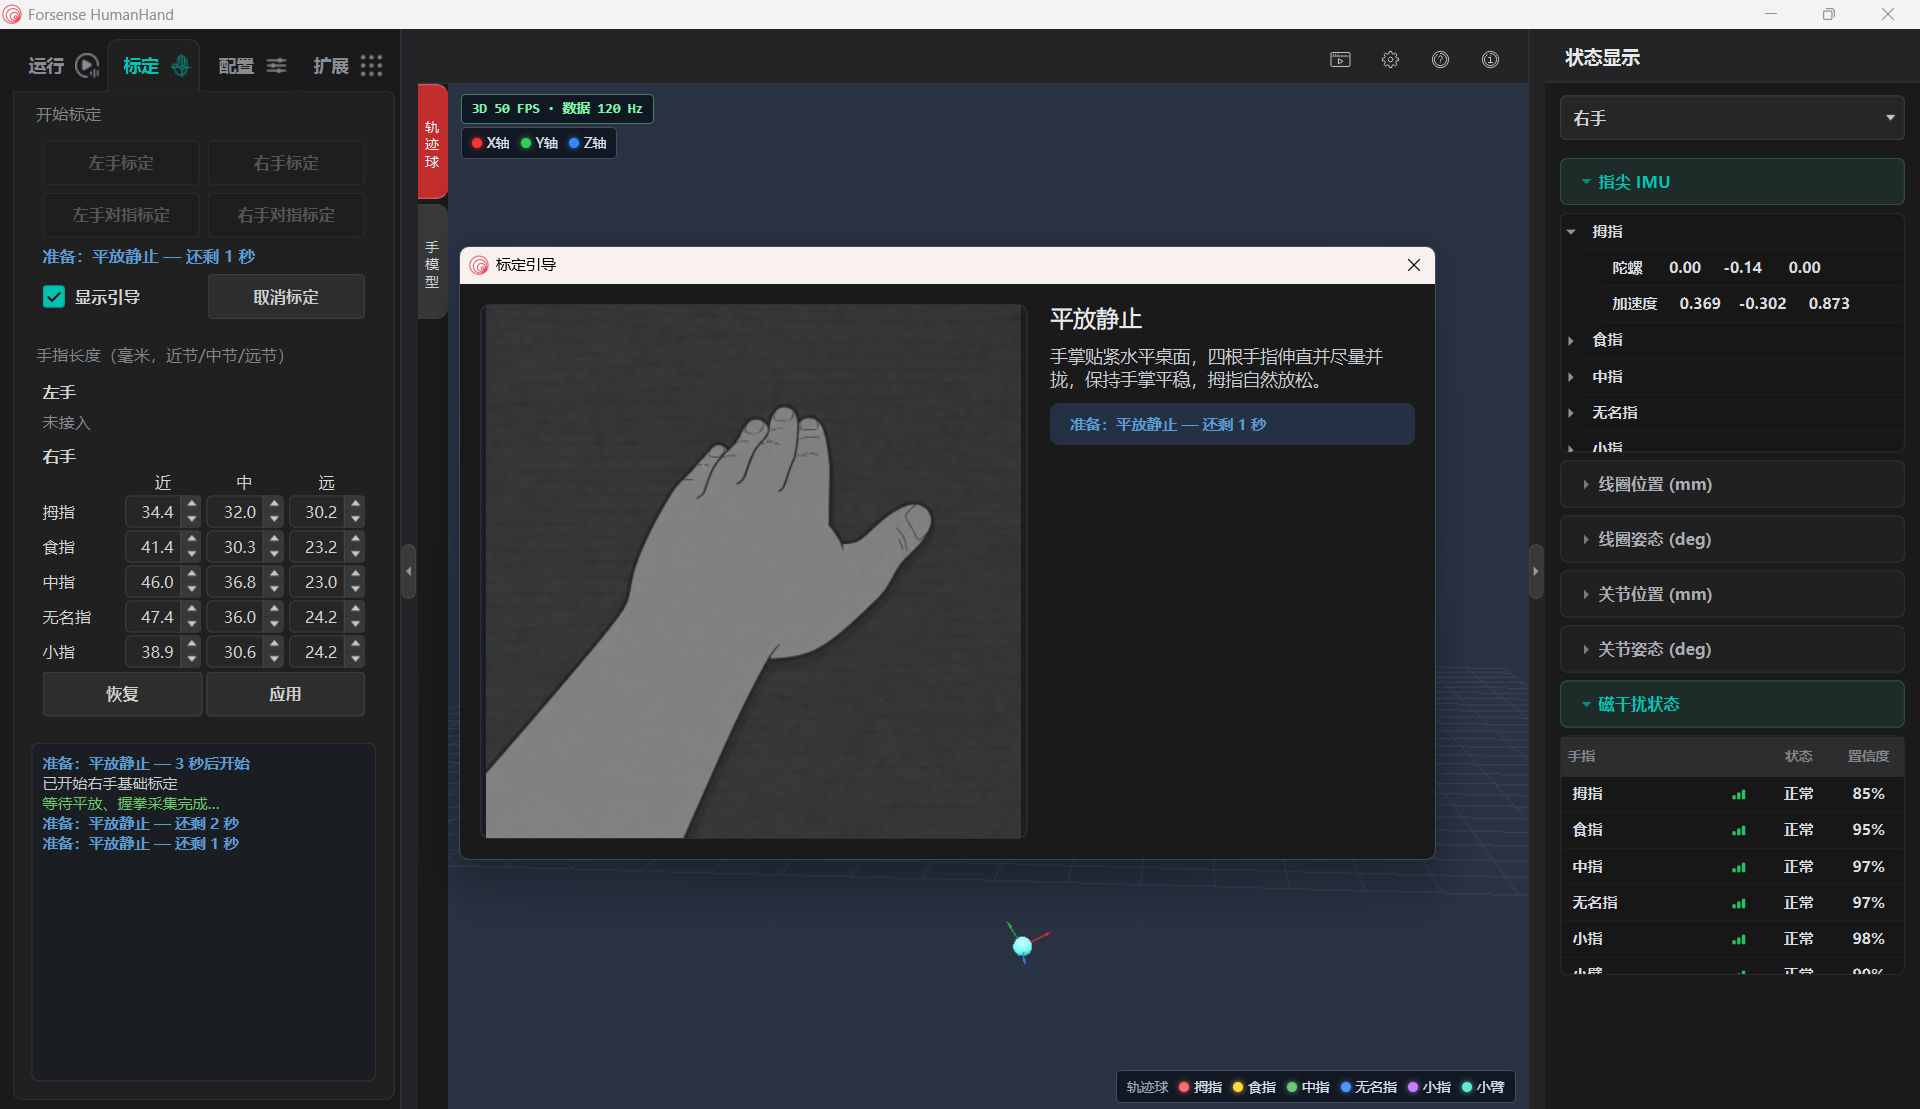
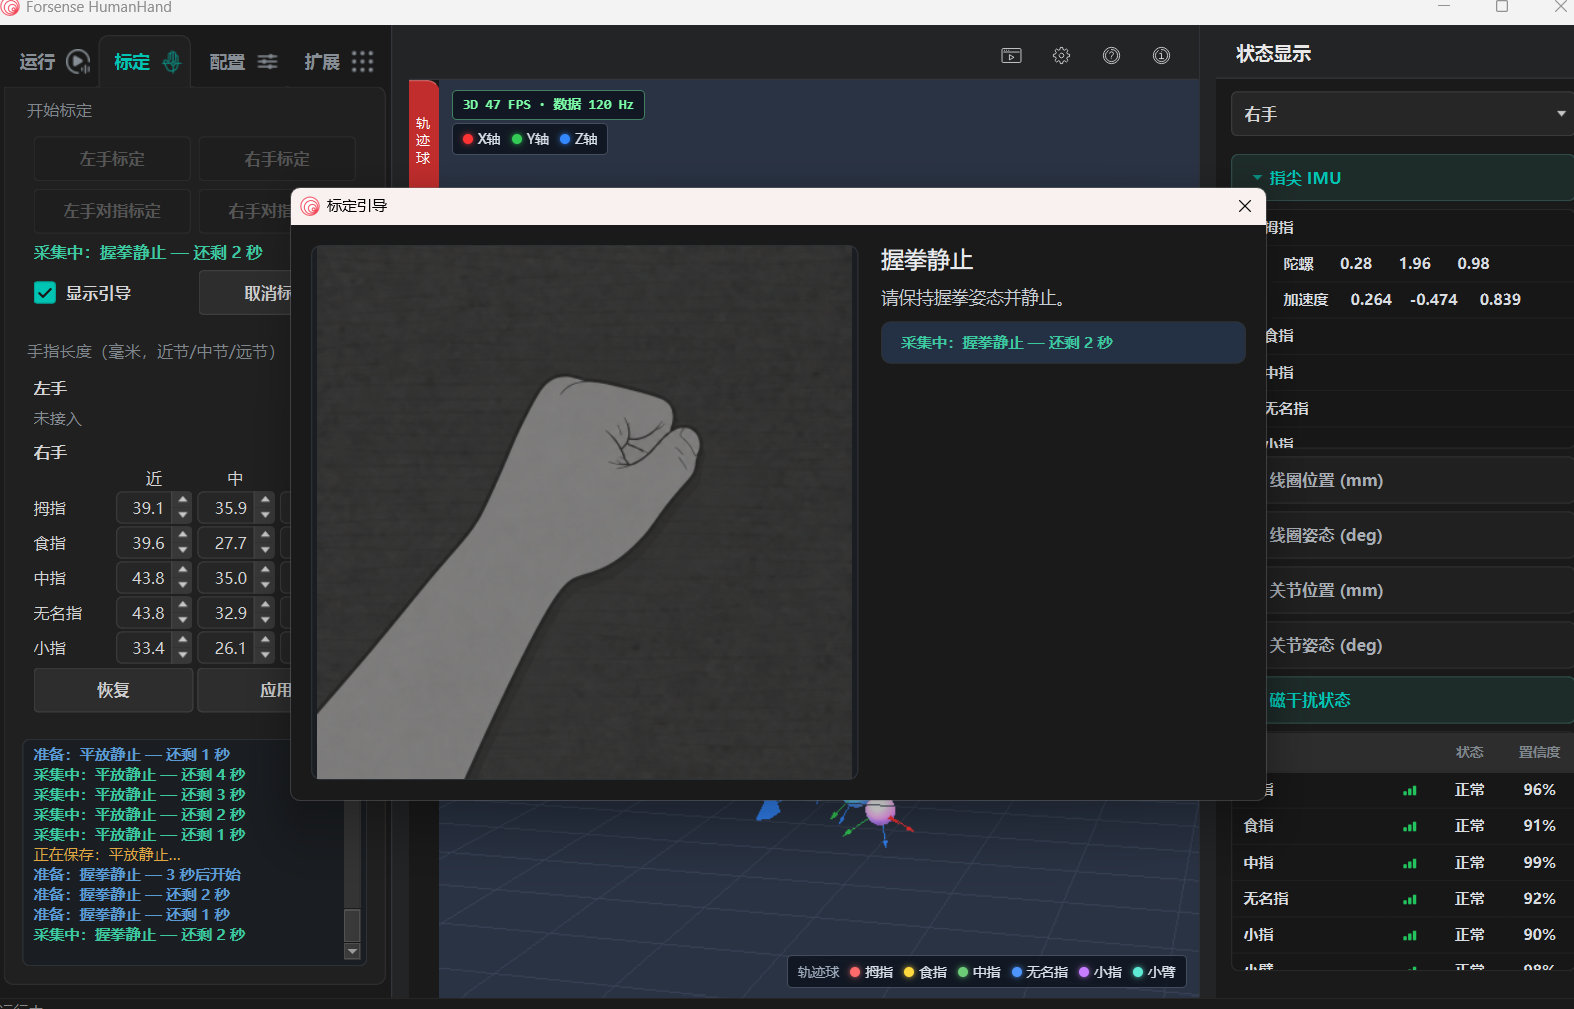
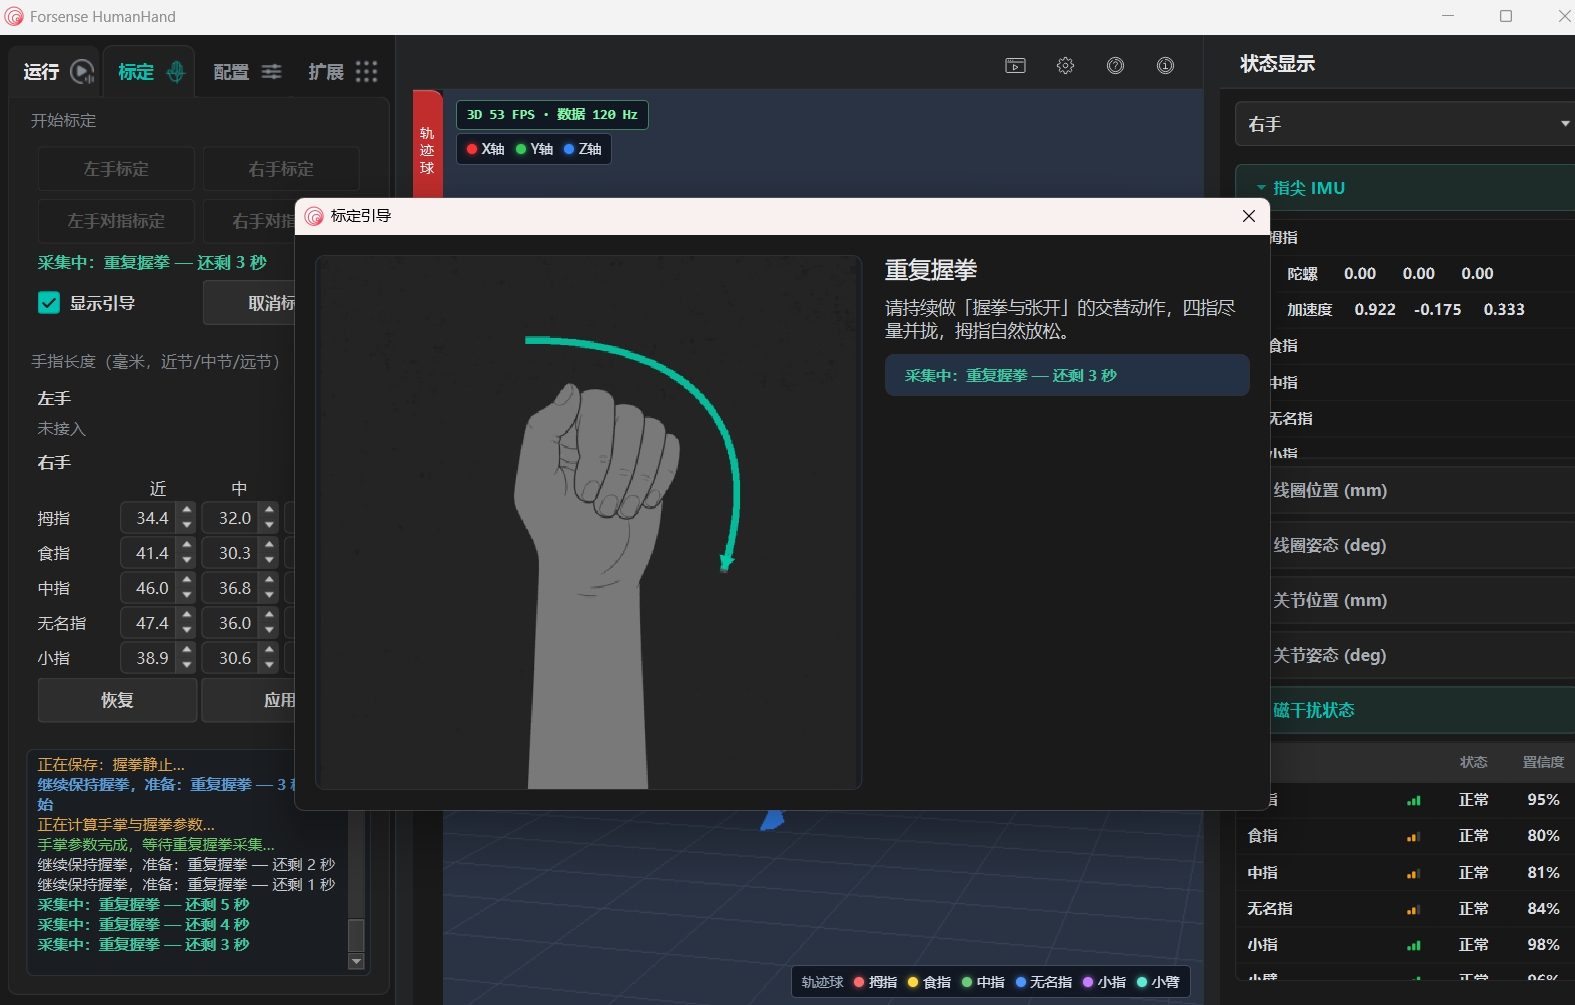
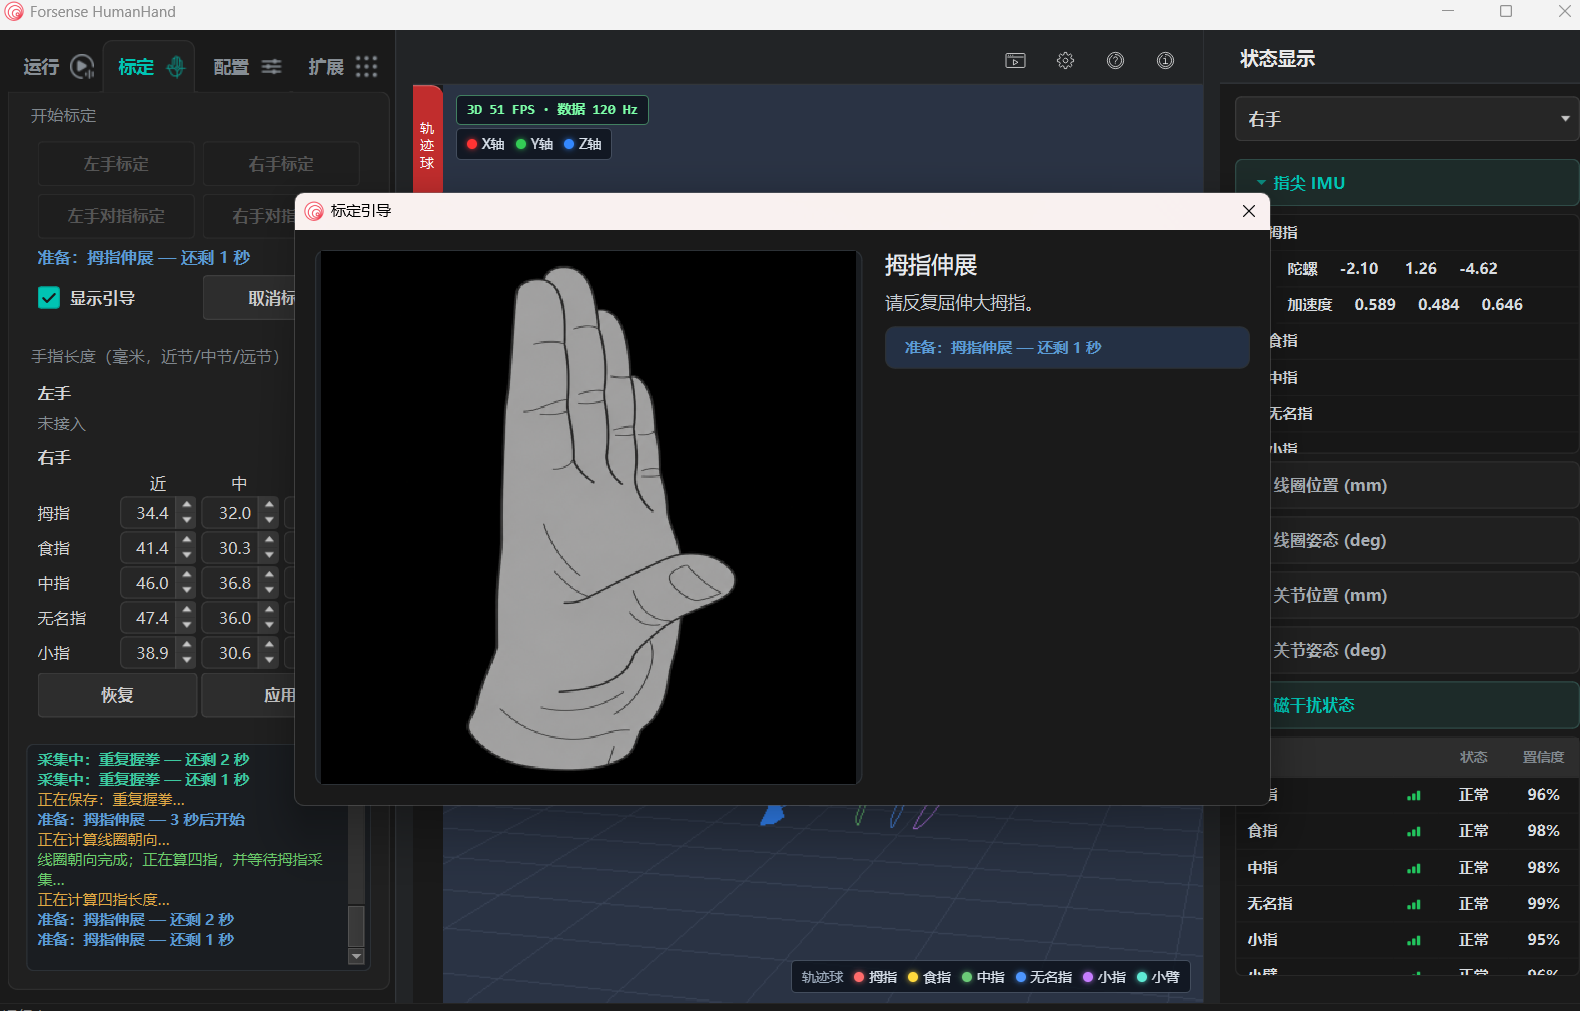
- Click Pinch Calibration to start the second motion calibration:
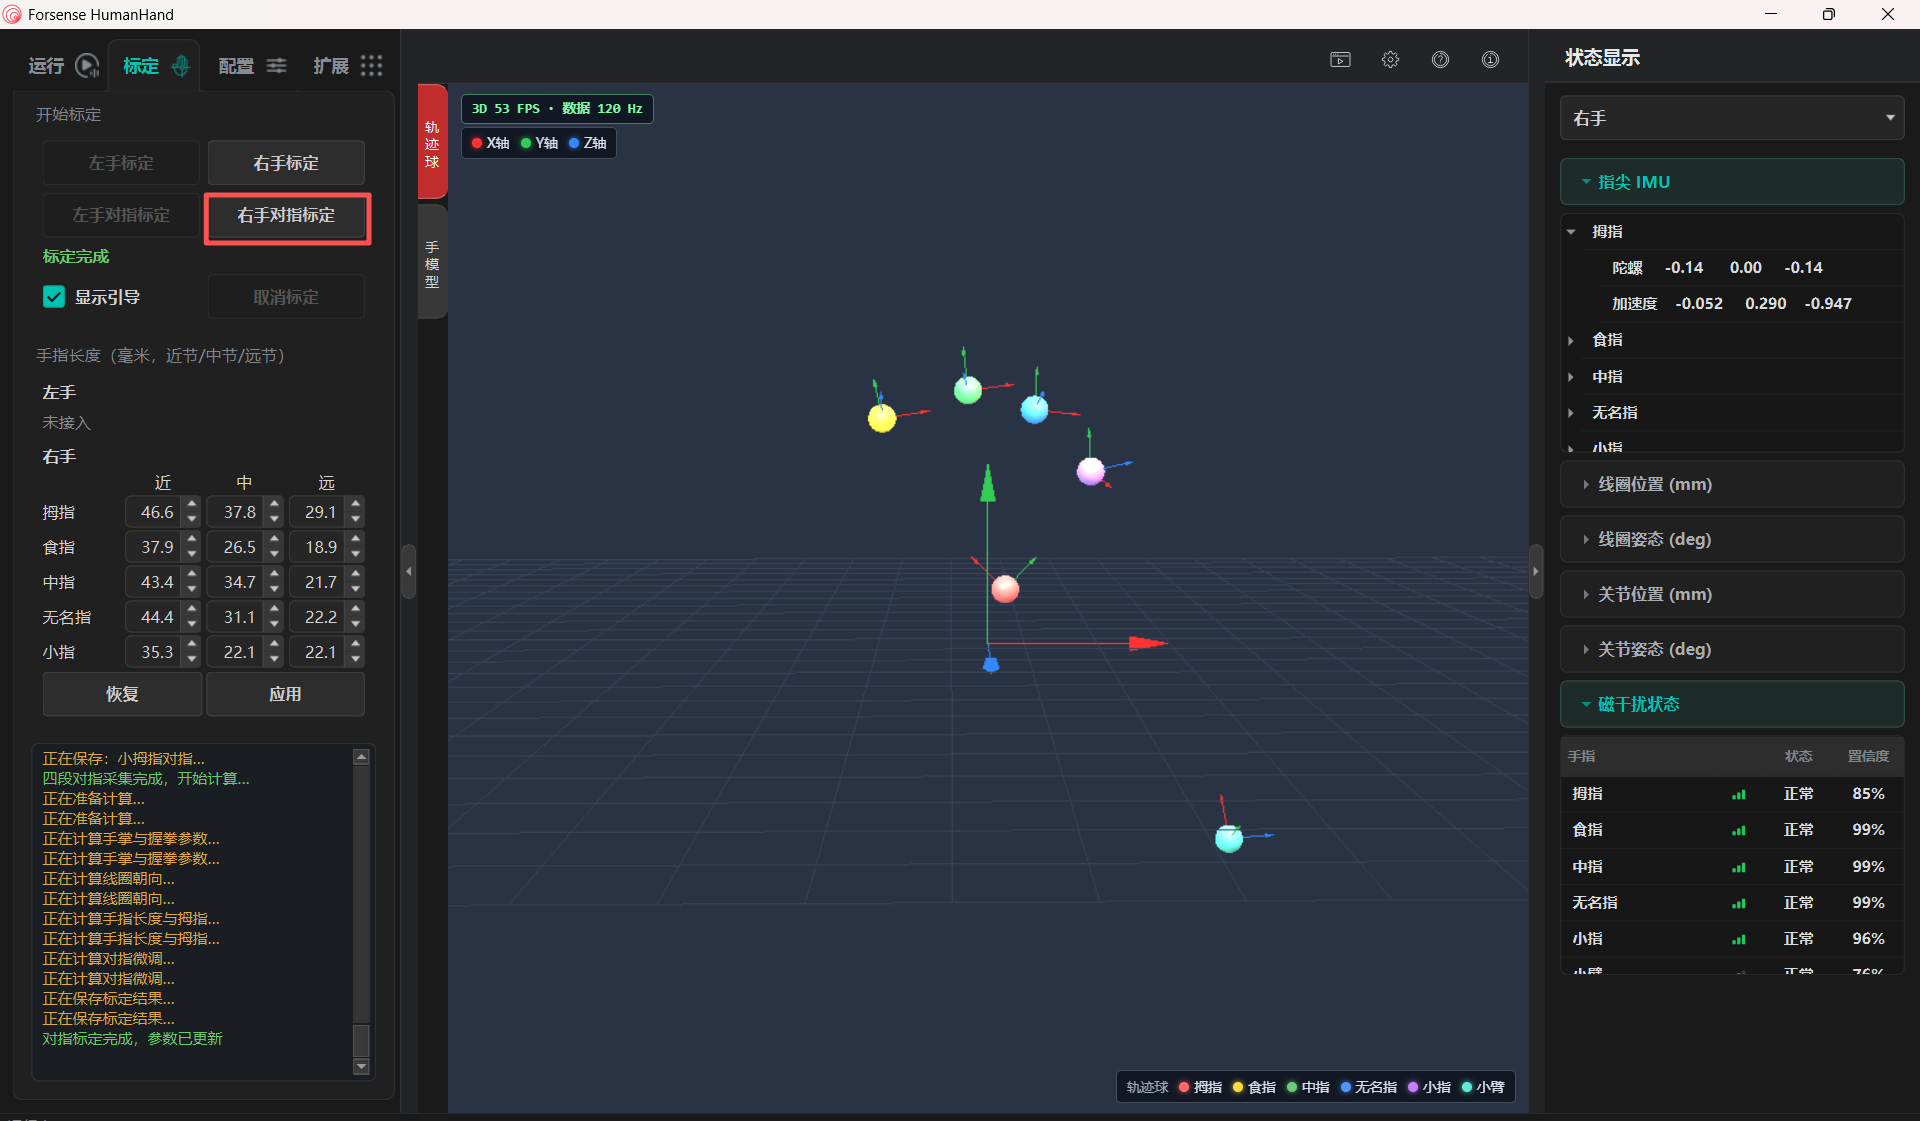
- Follow the illustrated prompts for pinch calibration:
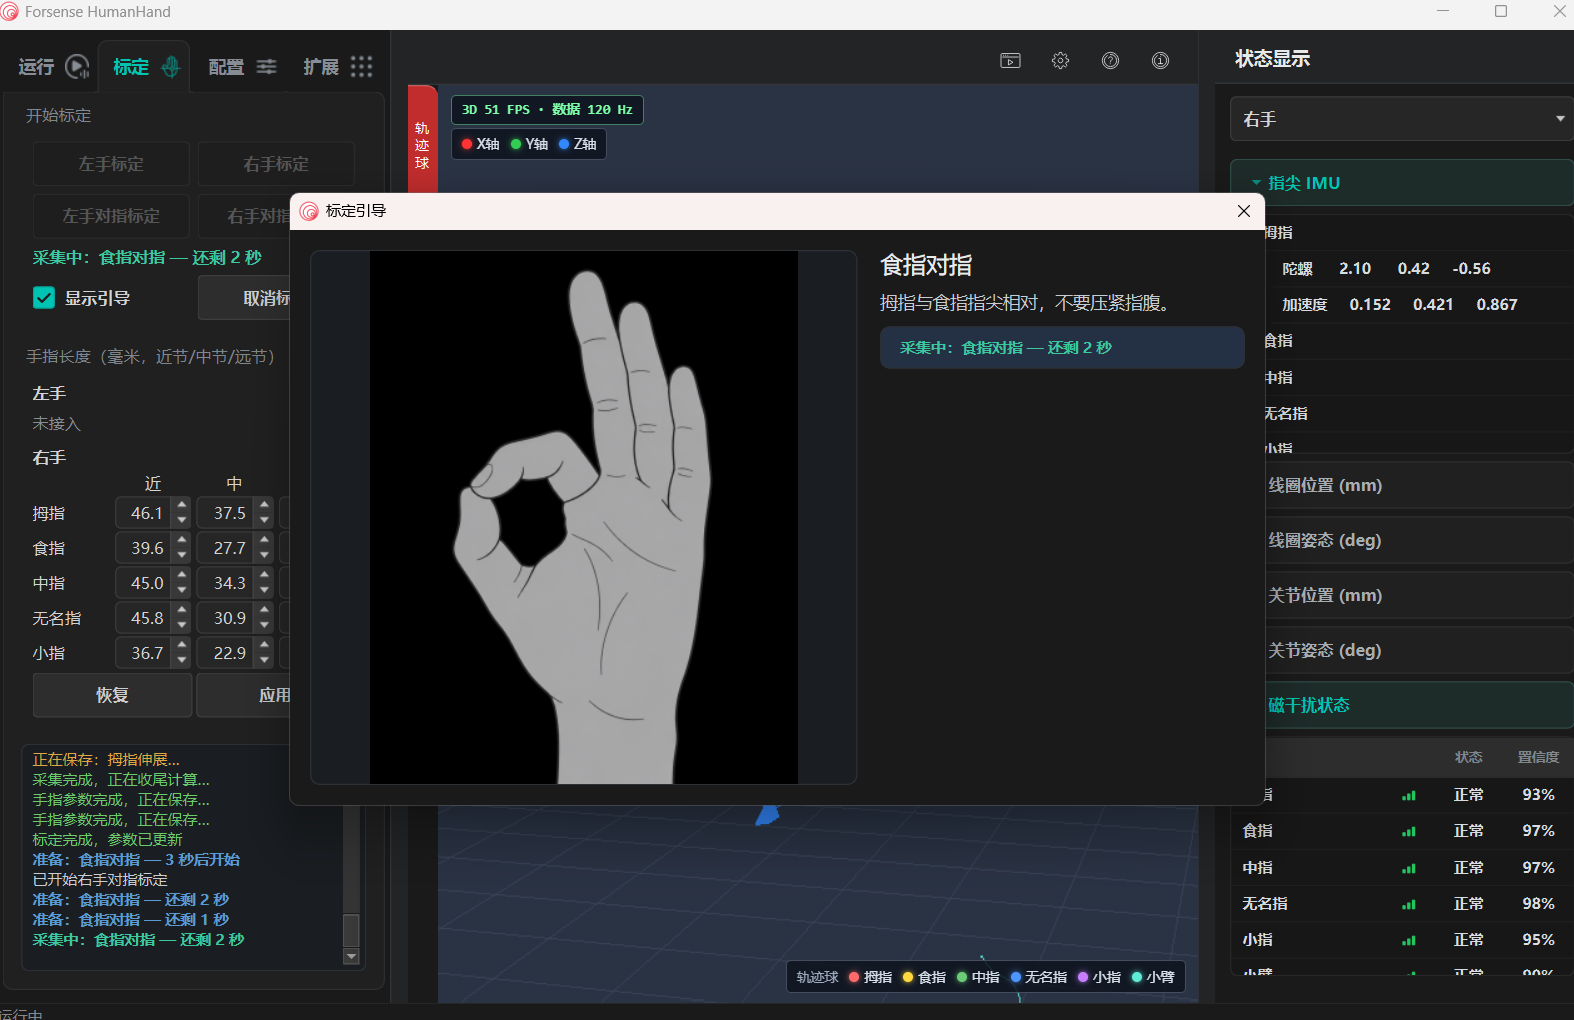
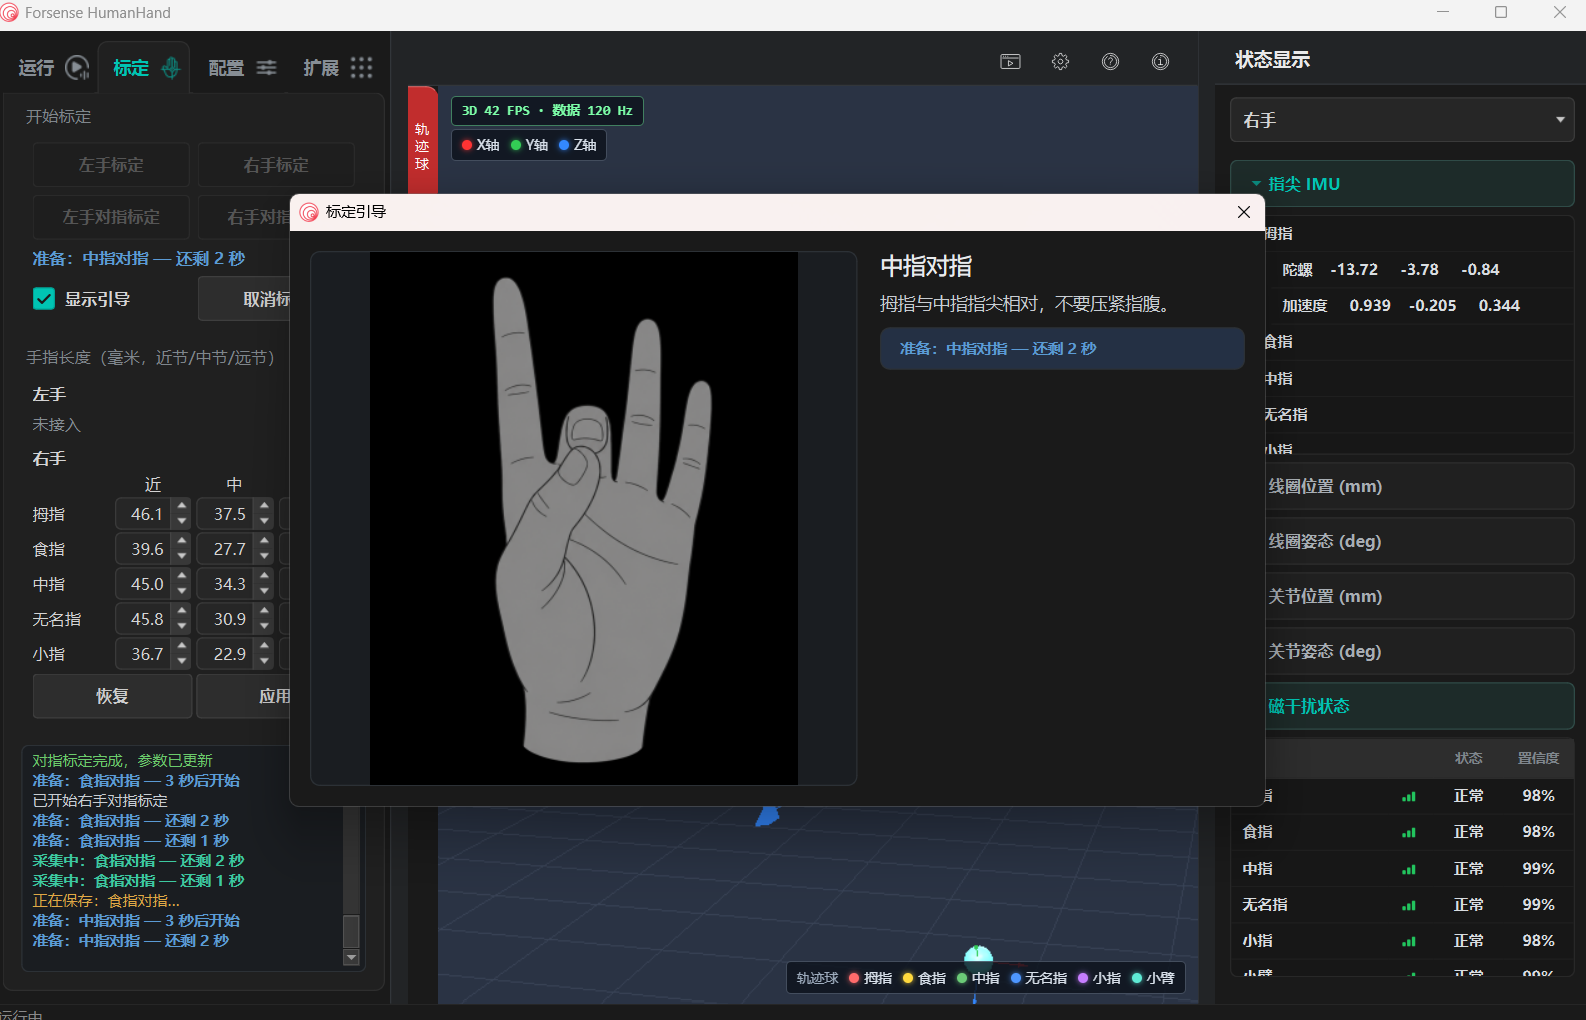
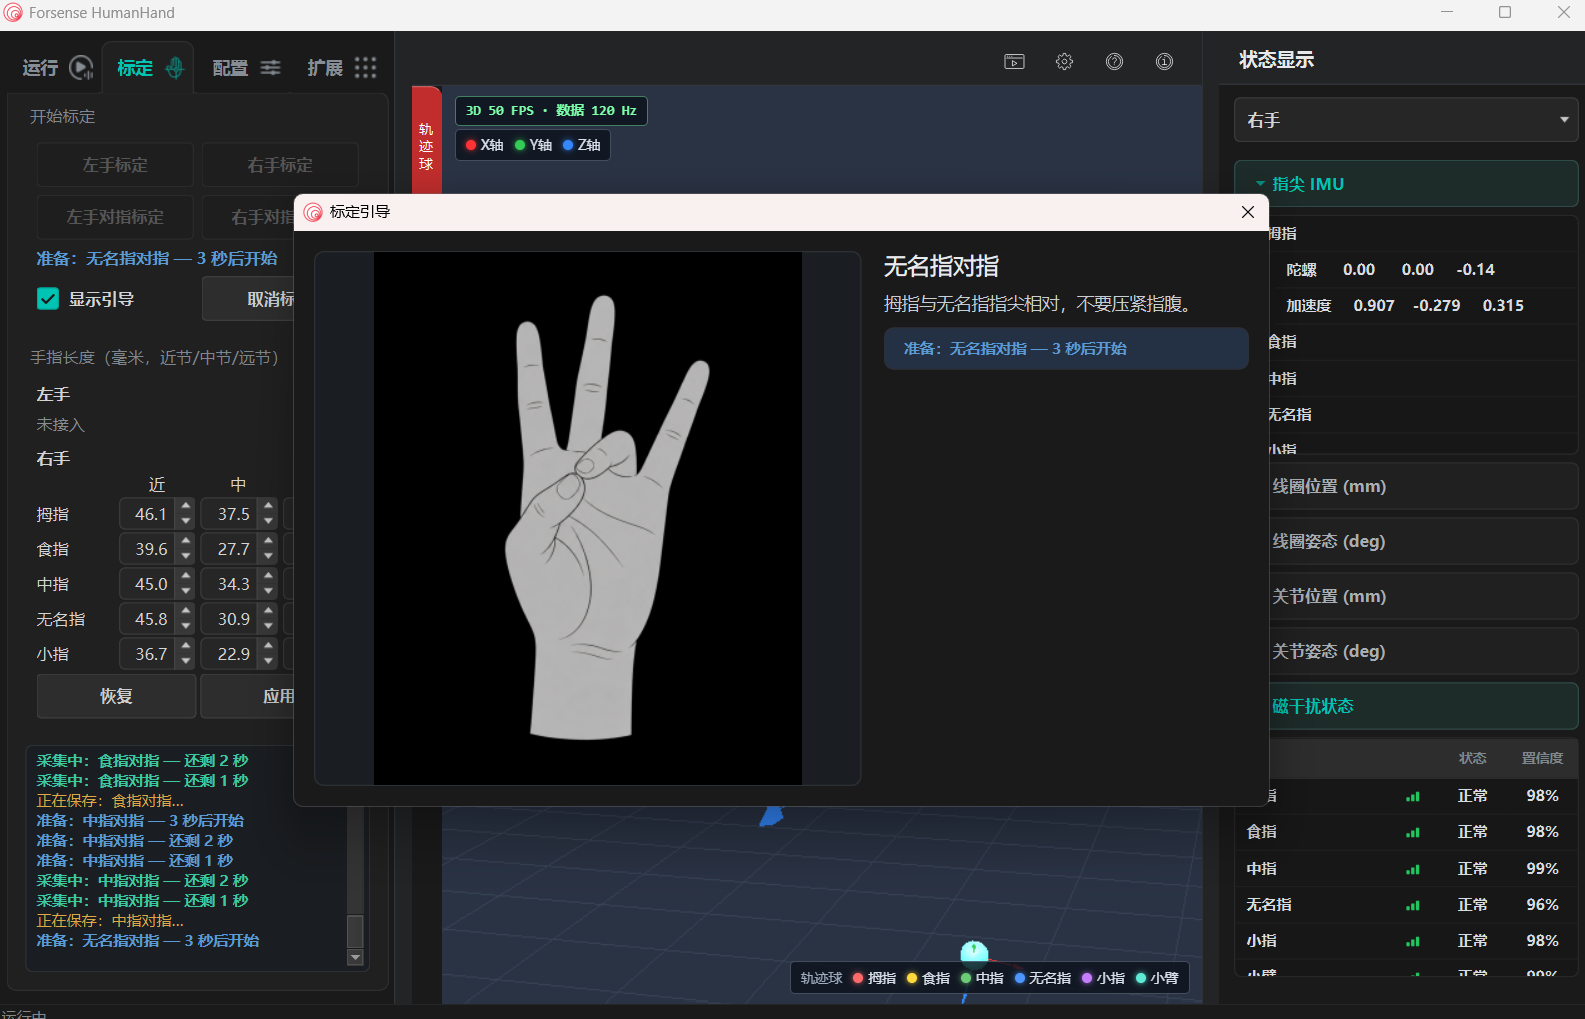
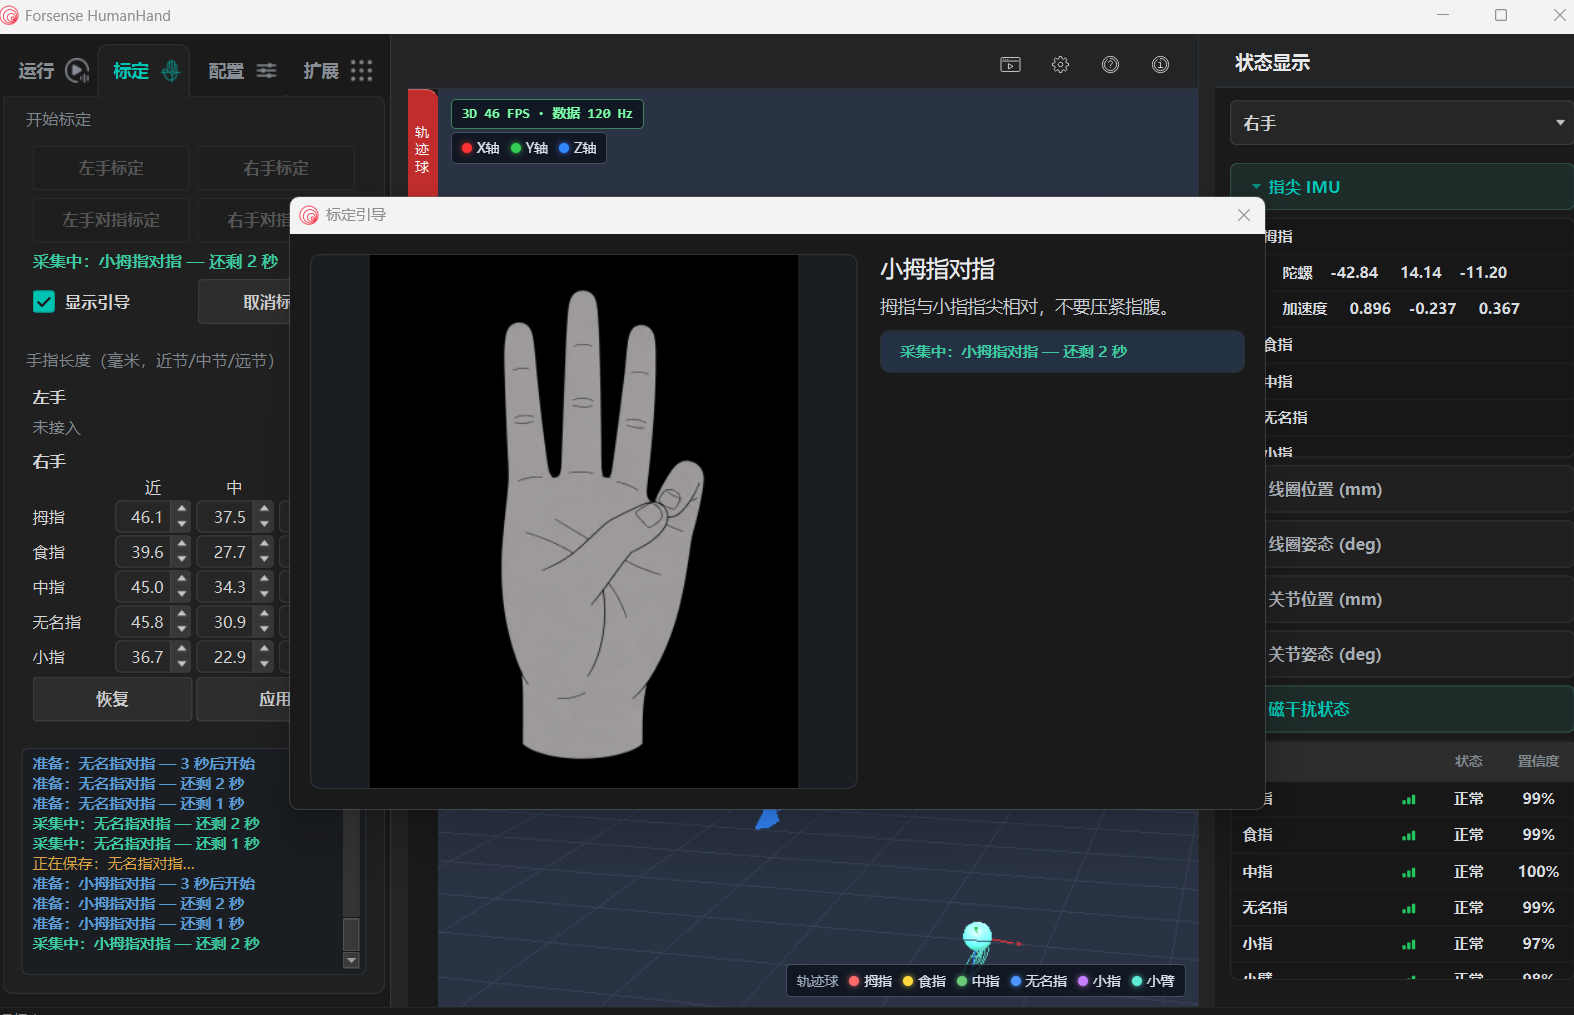
- After these poses, calibration exits automatically and succeeds.
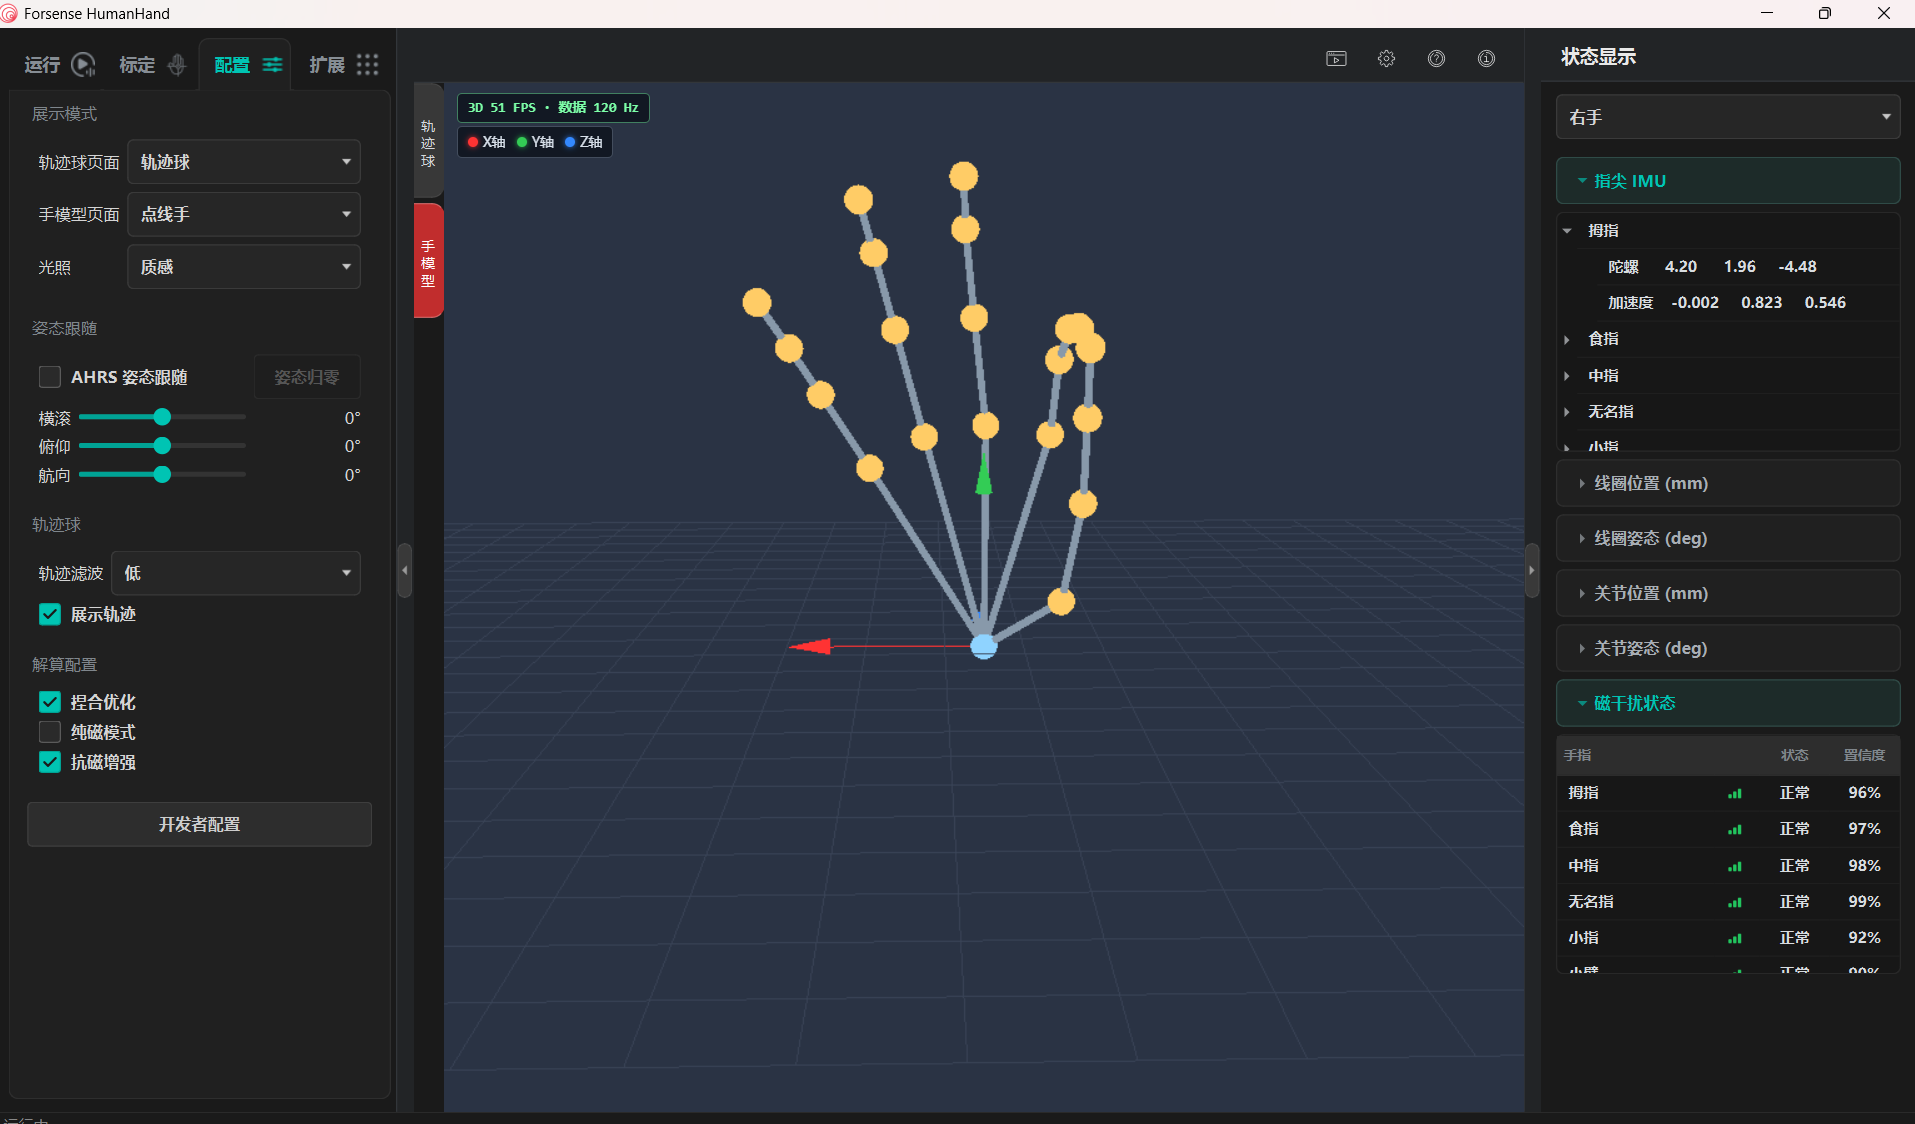
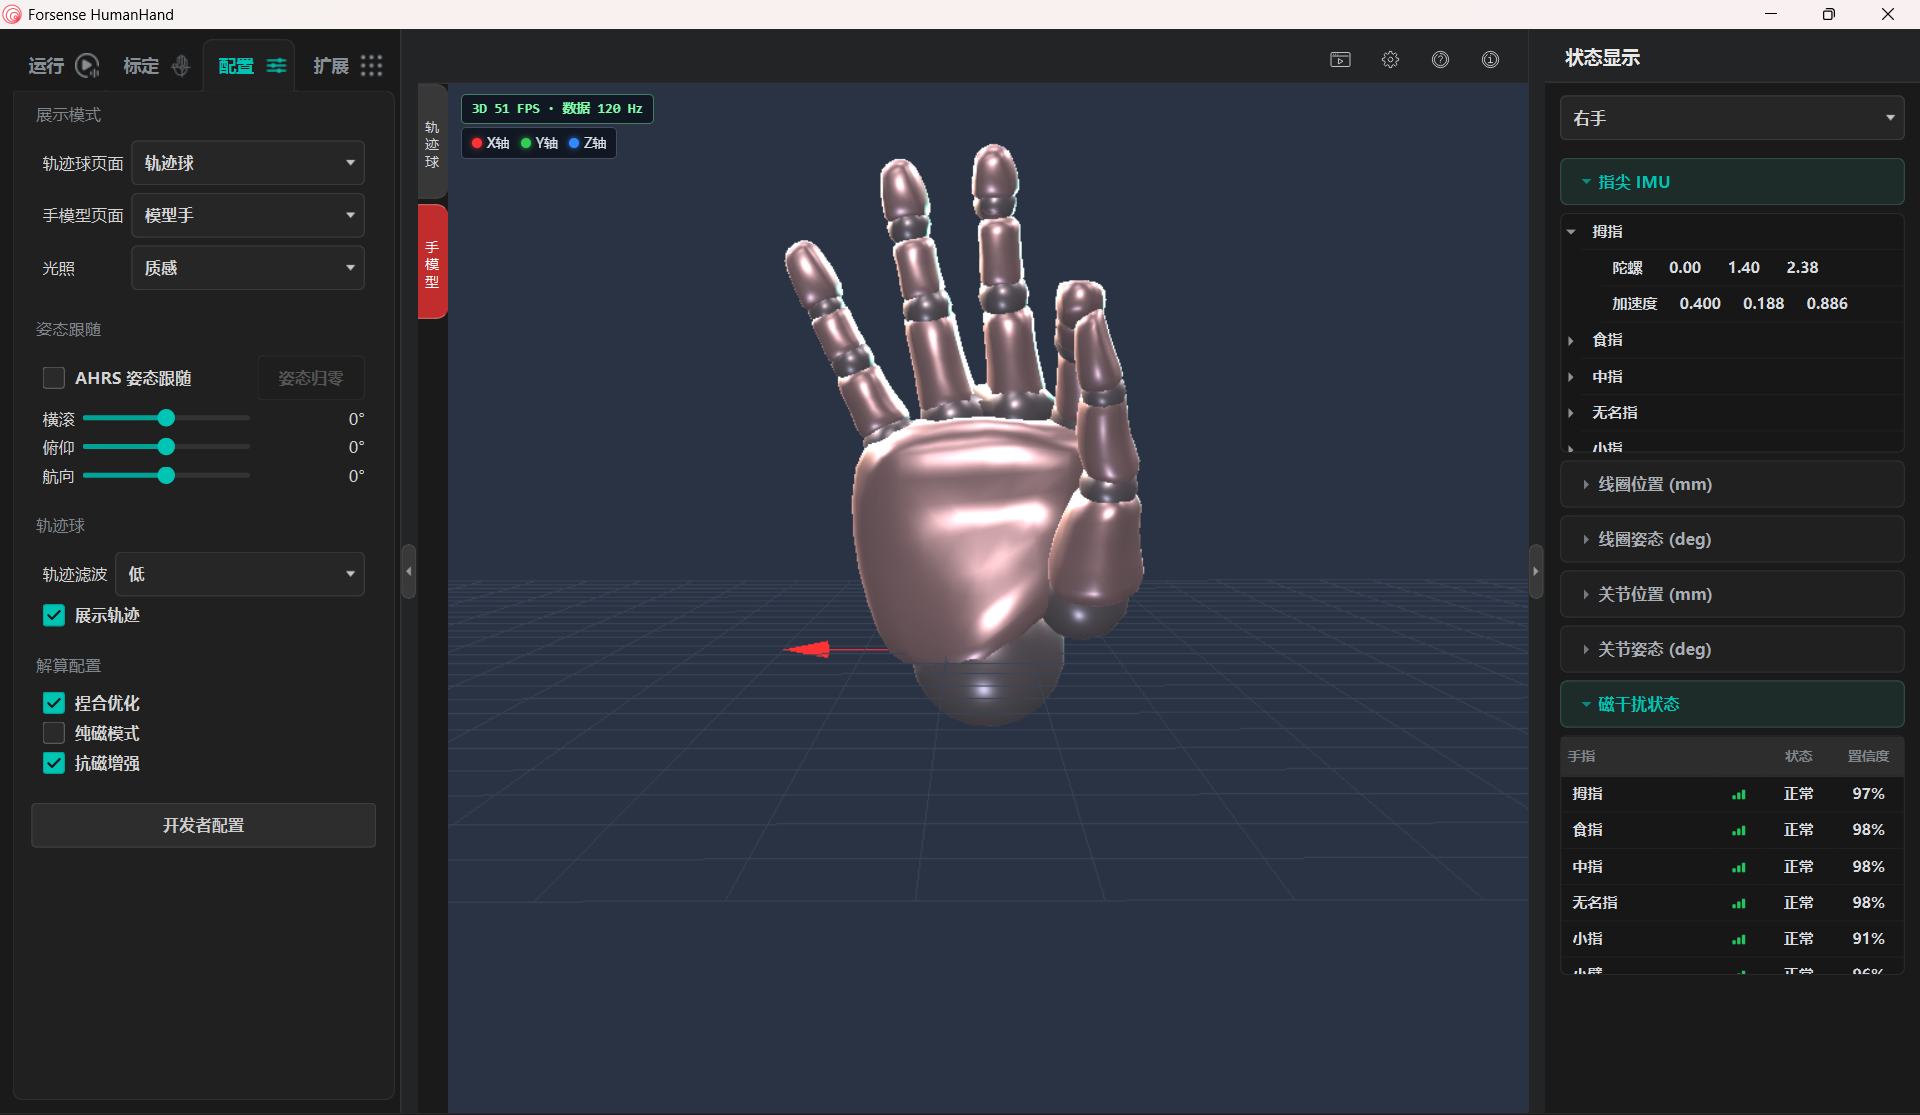
2.3.2 Motion Display
Drive the hand model to display hand motion.
Confirm that the device is connected and motion calibration has succeeded.
After calibration, the hand model in the software follows the user’s hand motion.
Right-drag in the viewport to rotate the hand model.
Interface
- Hand-model motion display:
2.4 Recording Motion
Record and export the desired motion.
Record in the software as follows:
Confirm that the device is connected and motion calibration has succeeded.
Click Record on the recording toolbar, or use the shortcut, to start recording. The maximum recording length is 1 hour; recording stops automatically after that.
Click Stop on the recording toolbar, or use the shortcut, to end recording.
Interface
- Recording interface:
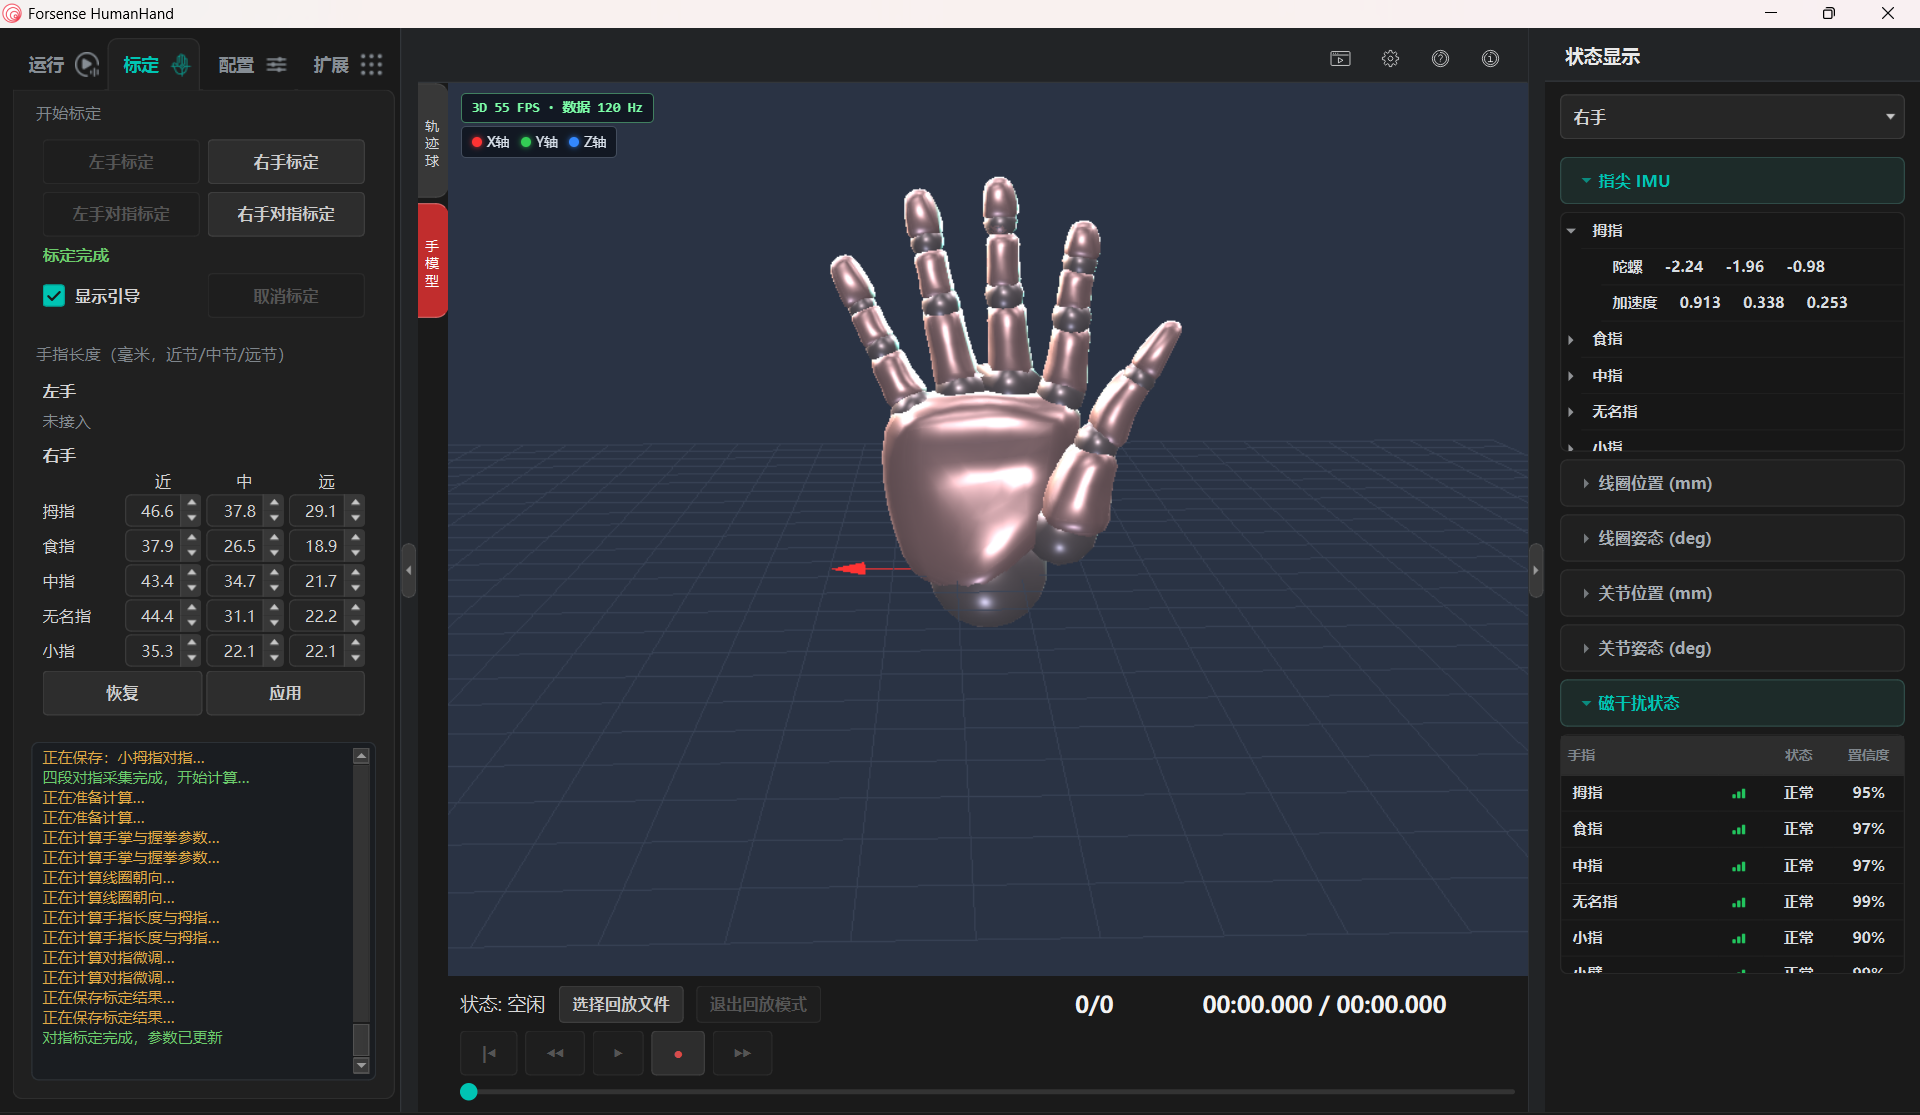
- Click Record on the recording toolbar:

- After recording ends, inspect the captured motion:
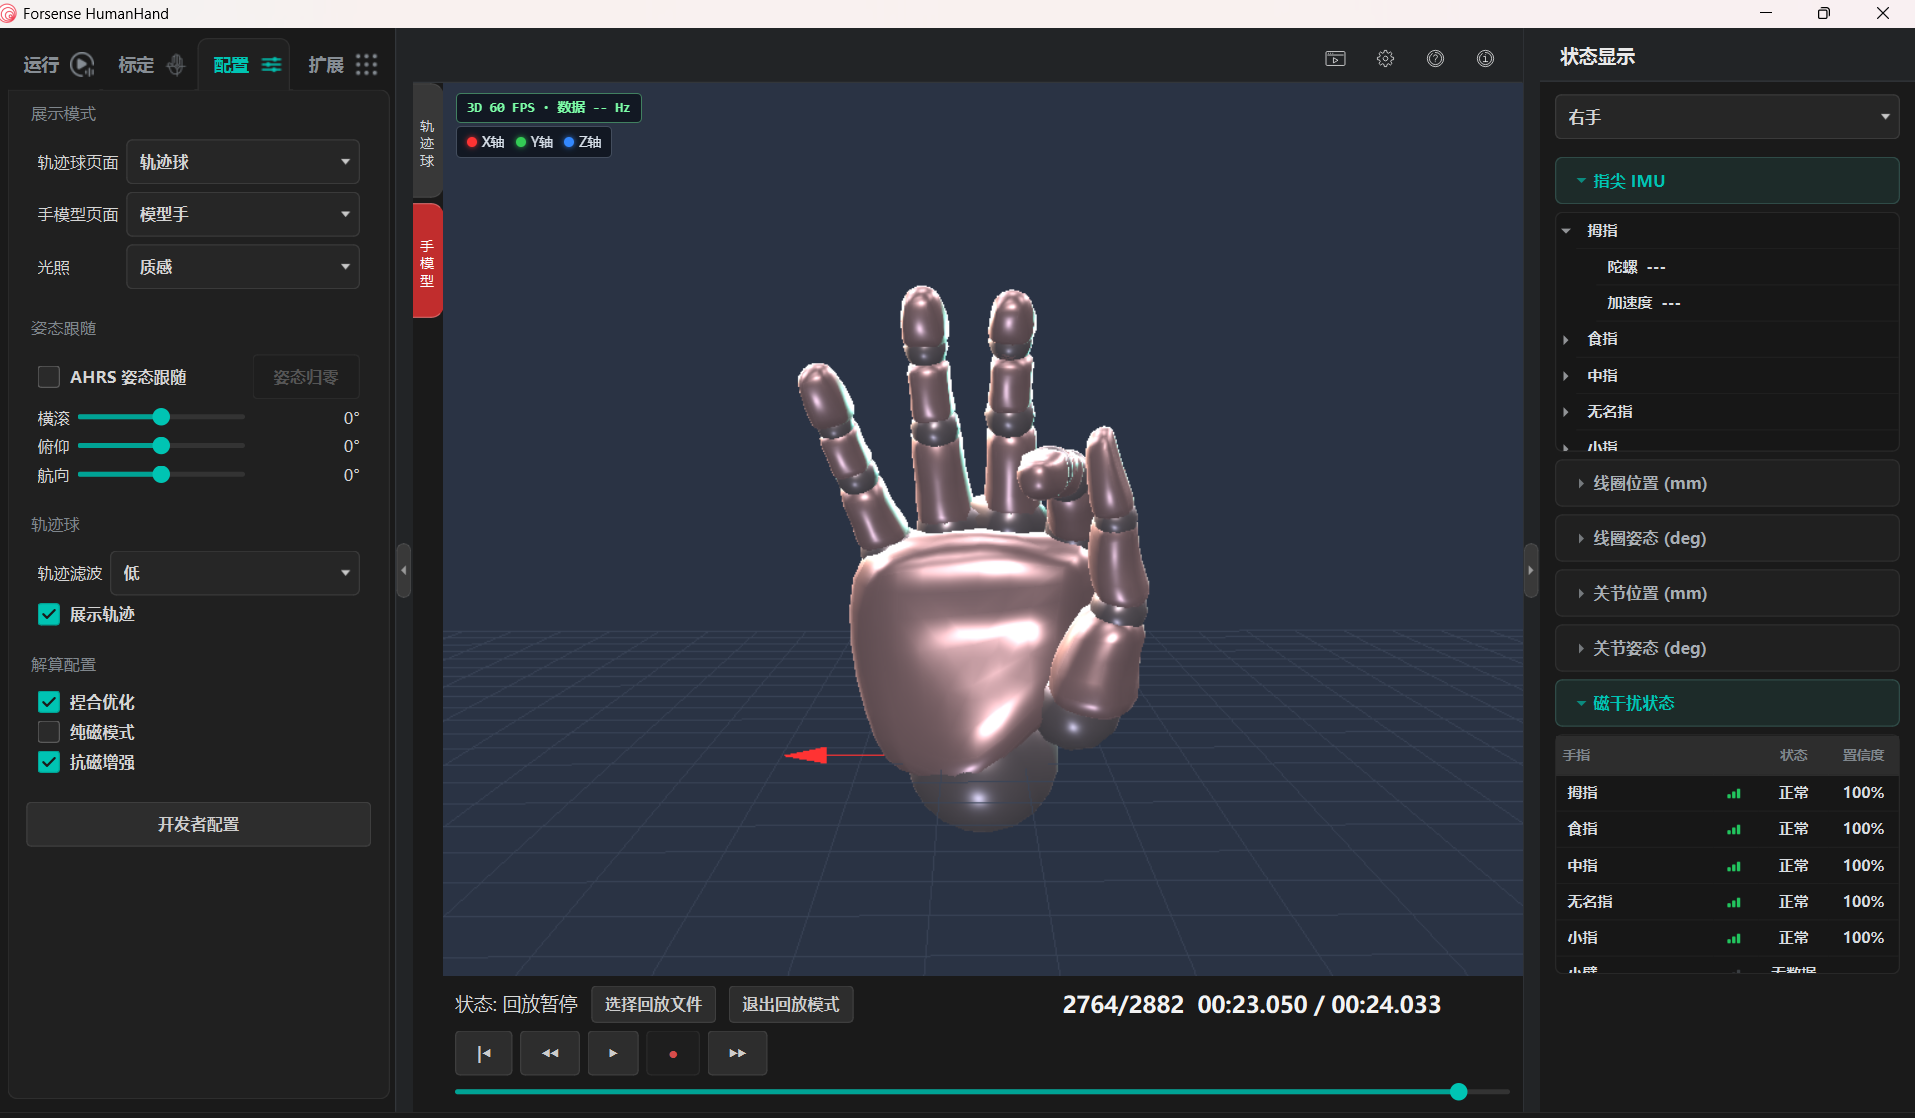
Play:

Pause:

Previous frame:

Next frame:

Go to the first frame:

2.5 Interface Configuration
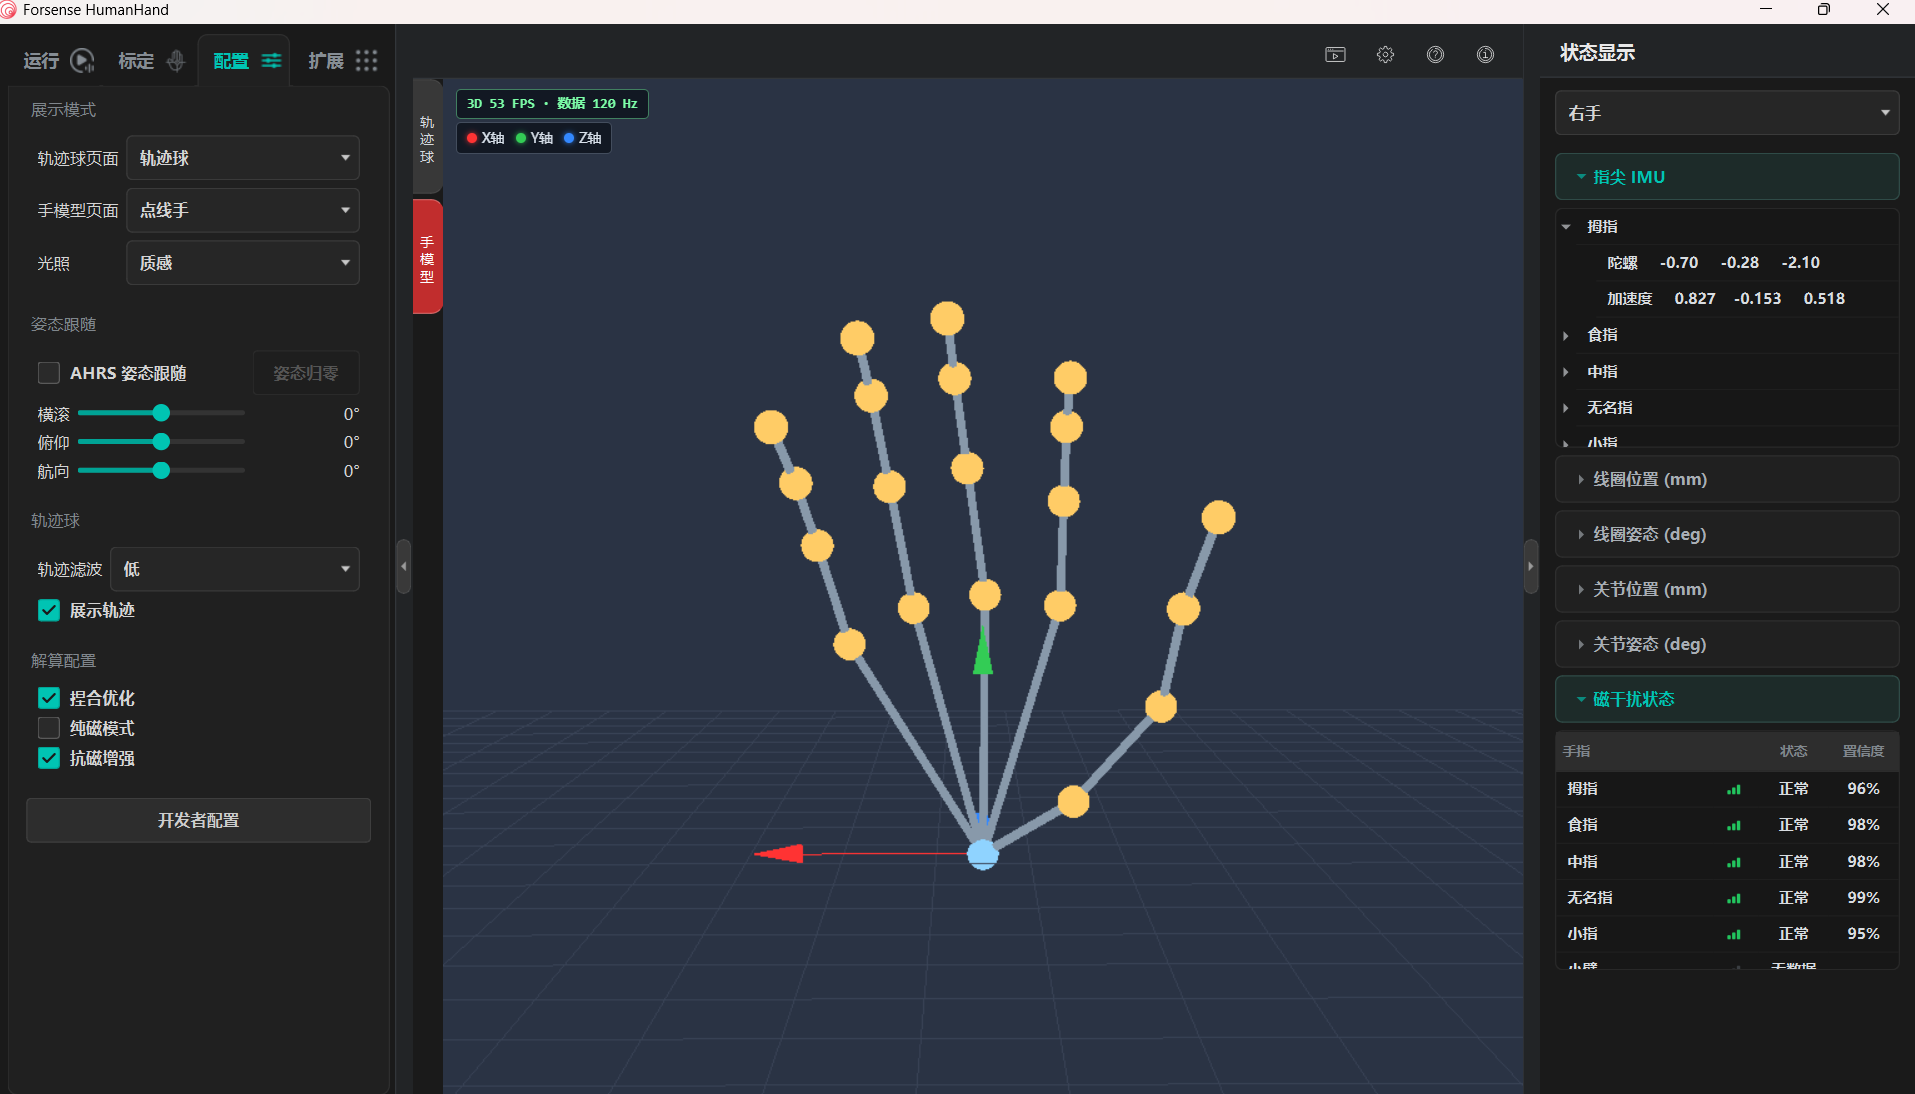
On this page you can enable the trackball, hand-model selection, lighting, AHRS pose following, trajectory display, pinch optimization, magnetic-only mode, and anti-magnetic enhancement, and view fingertip IMU data, coil position, coil pose, joint position, joint pose, and magnetic-interference status.
2.6 Settings, Help, and About
2.6.1 File Storage Path
You can set the default export folder. View or change it as follows:
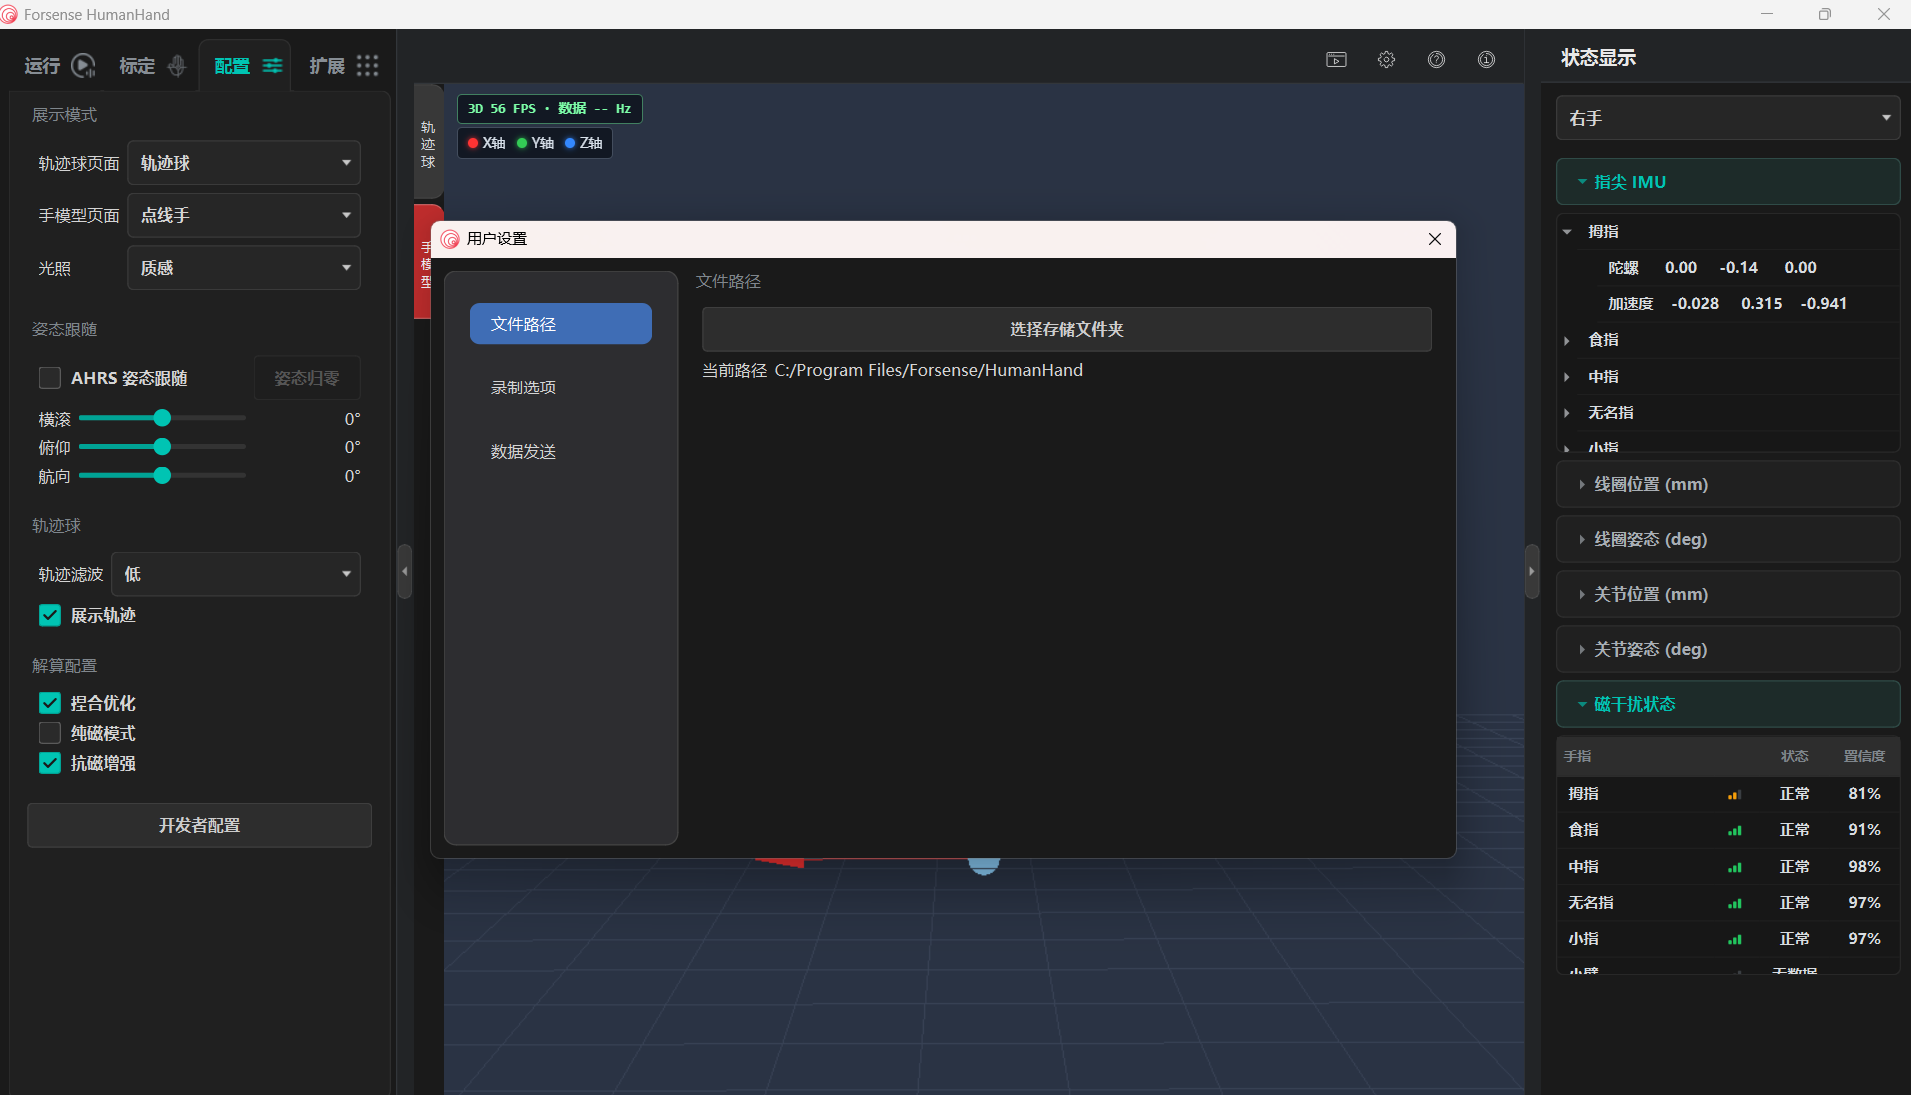
Click the gear icon in the upper-right corner to open Settings.
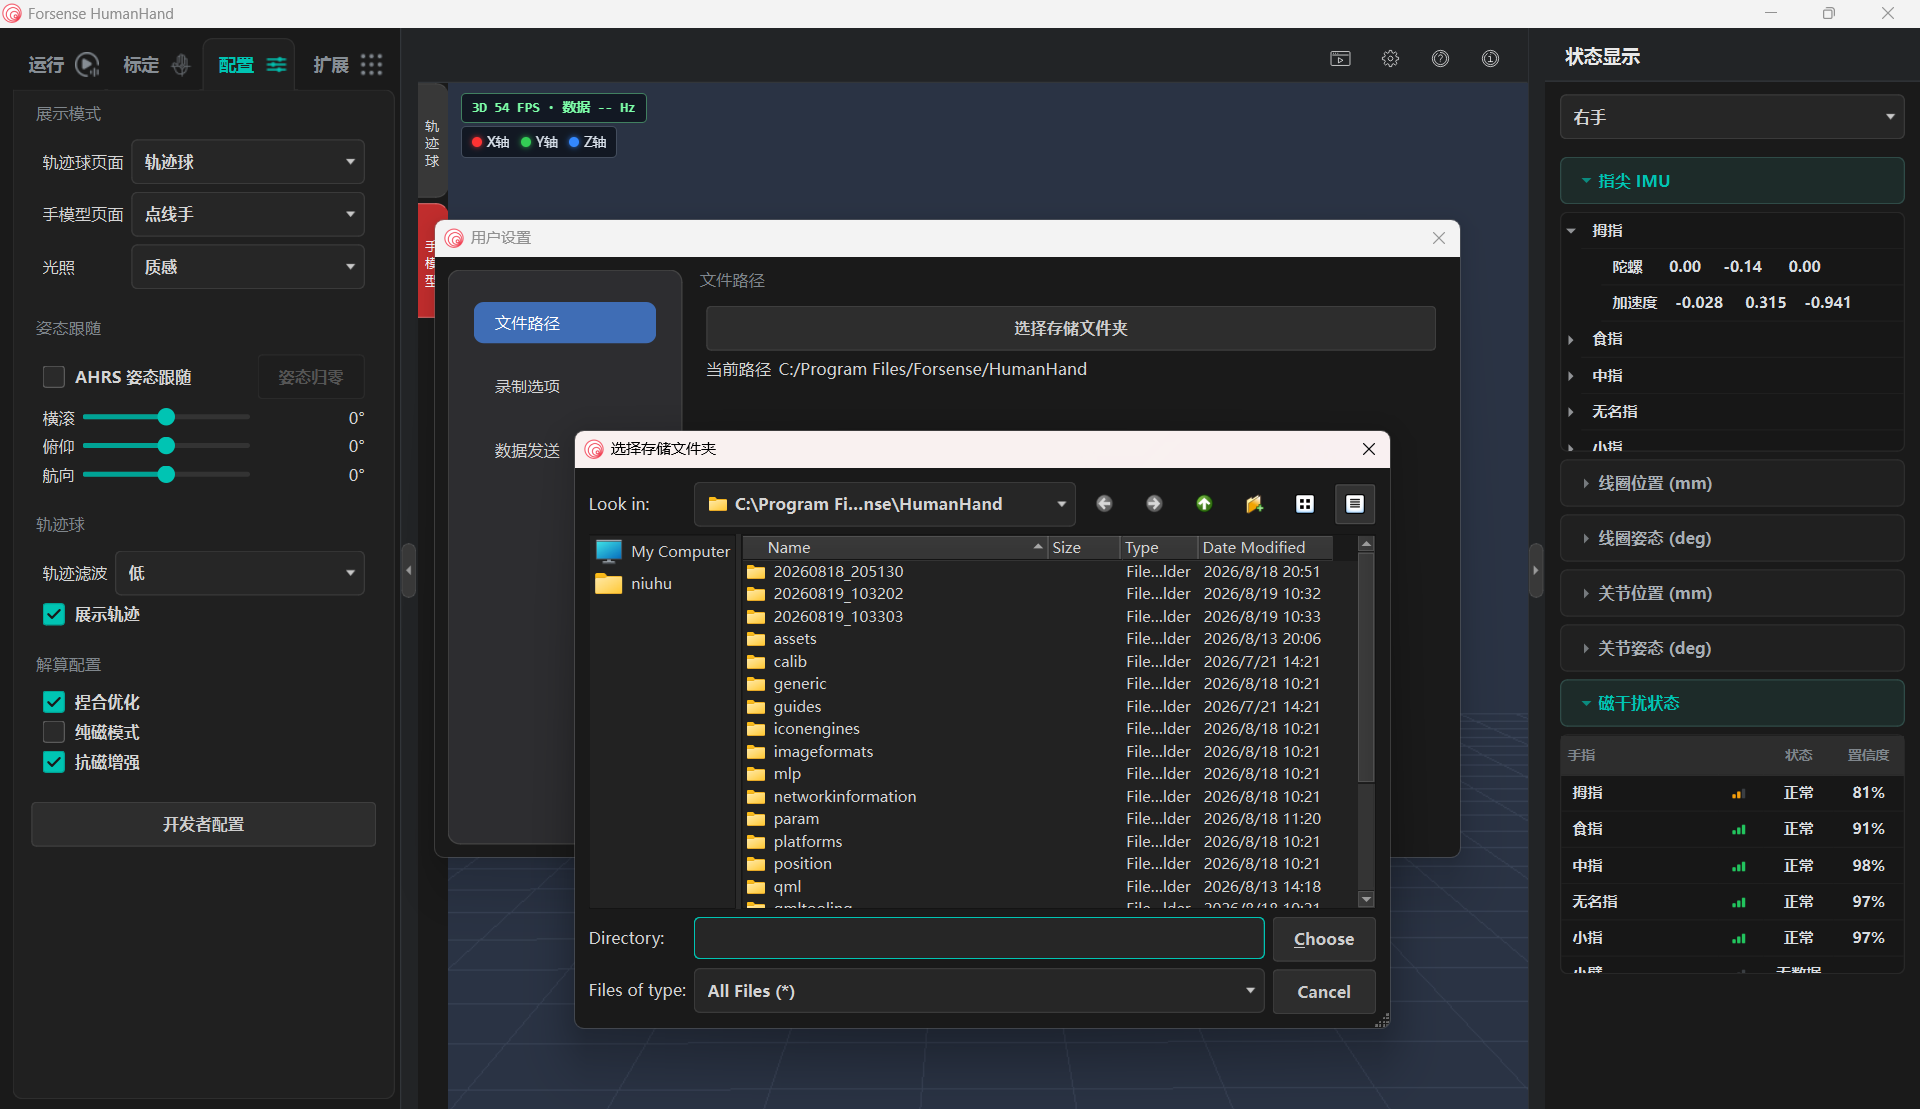
To the right of File Storage Path, click the folder icon. In the folder picker, select the destination folder and click Select Folder.
The selected path appears in the File Storage Path field.
Repeat these steps to change the path later.
Interface
- Click the gear icon in the upper-right corner to open Settings:

- Click the folder selector, choose the path, then click Select Folder. Click Cancel if you do not want to save the change:
2.6.2 Recording Options
Record and export the desired motion.
Record in the software as follows:
Confirm that the device is connected and motion calibration has succeeded.
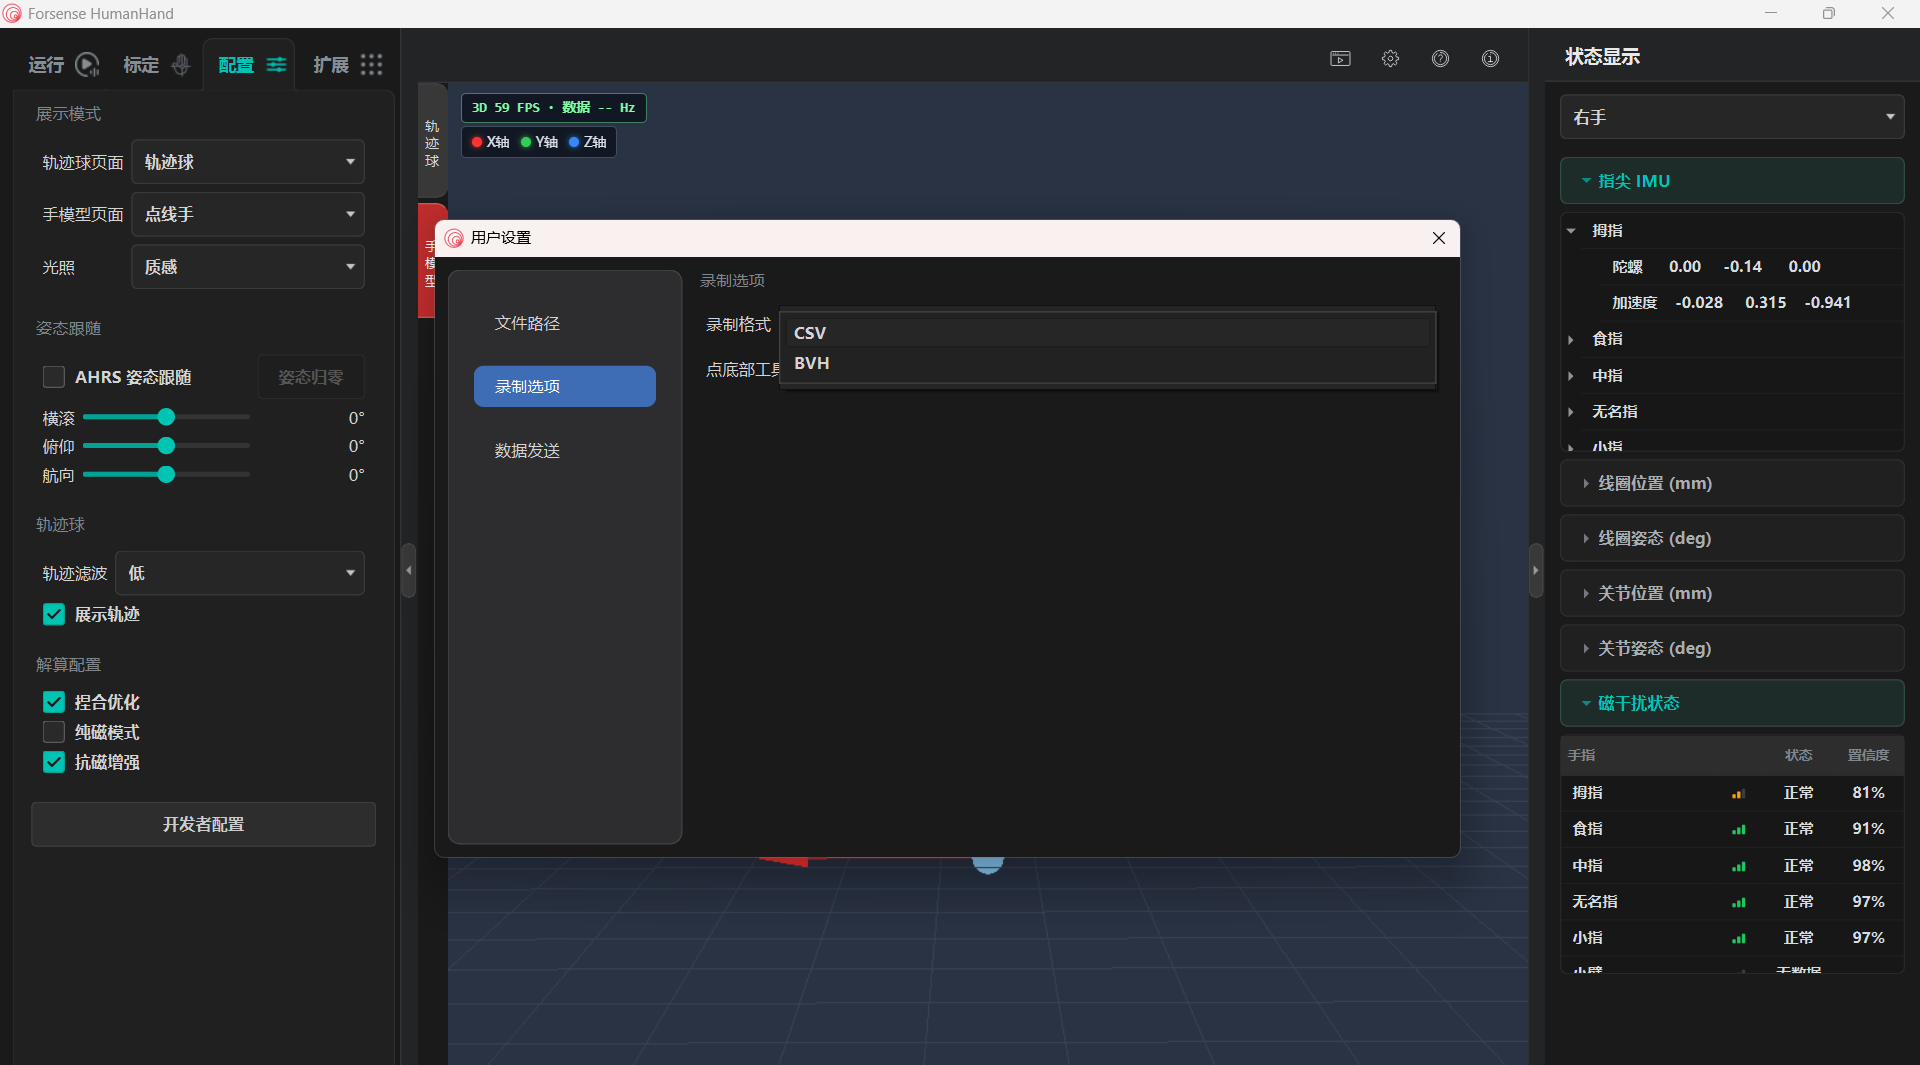
Set the file format, frame rate, and skeleton type.
Interface
- Click the gear icon in the upper-right corner to open Settings:

- In Settings, open Recording Options to configure the following:
2.6.3 Data Sending
Click the gear icon in the upper-right corner to open Settings, then select Data Sending.

- In Settings, open Data Sending to set destination IP, port, and output format:
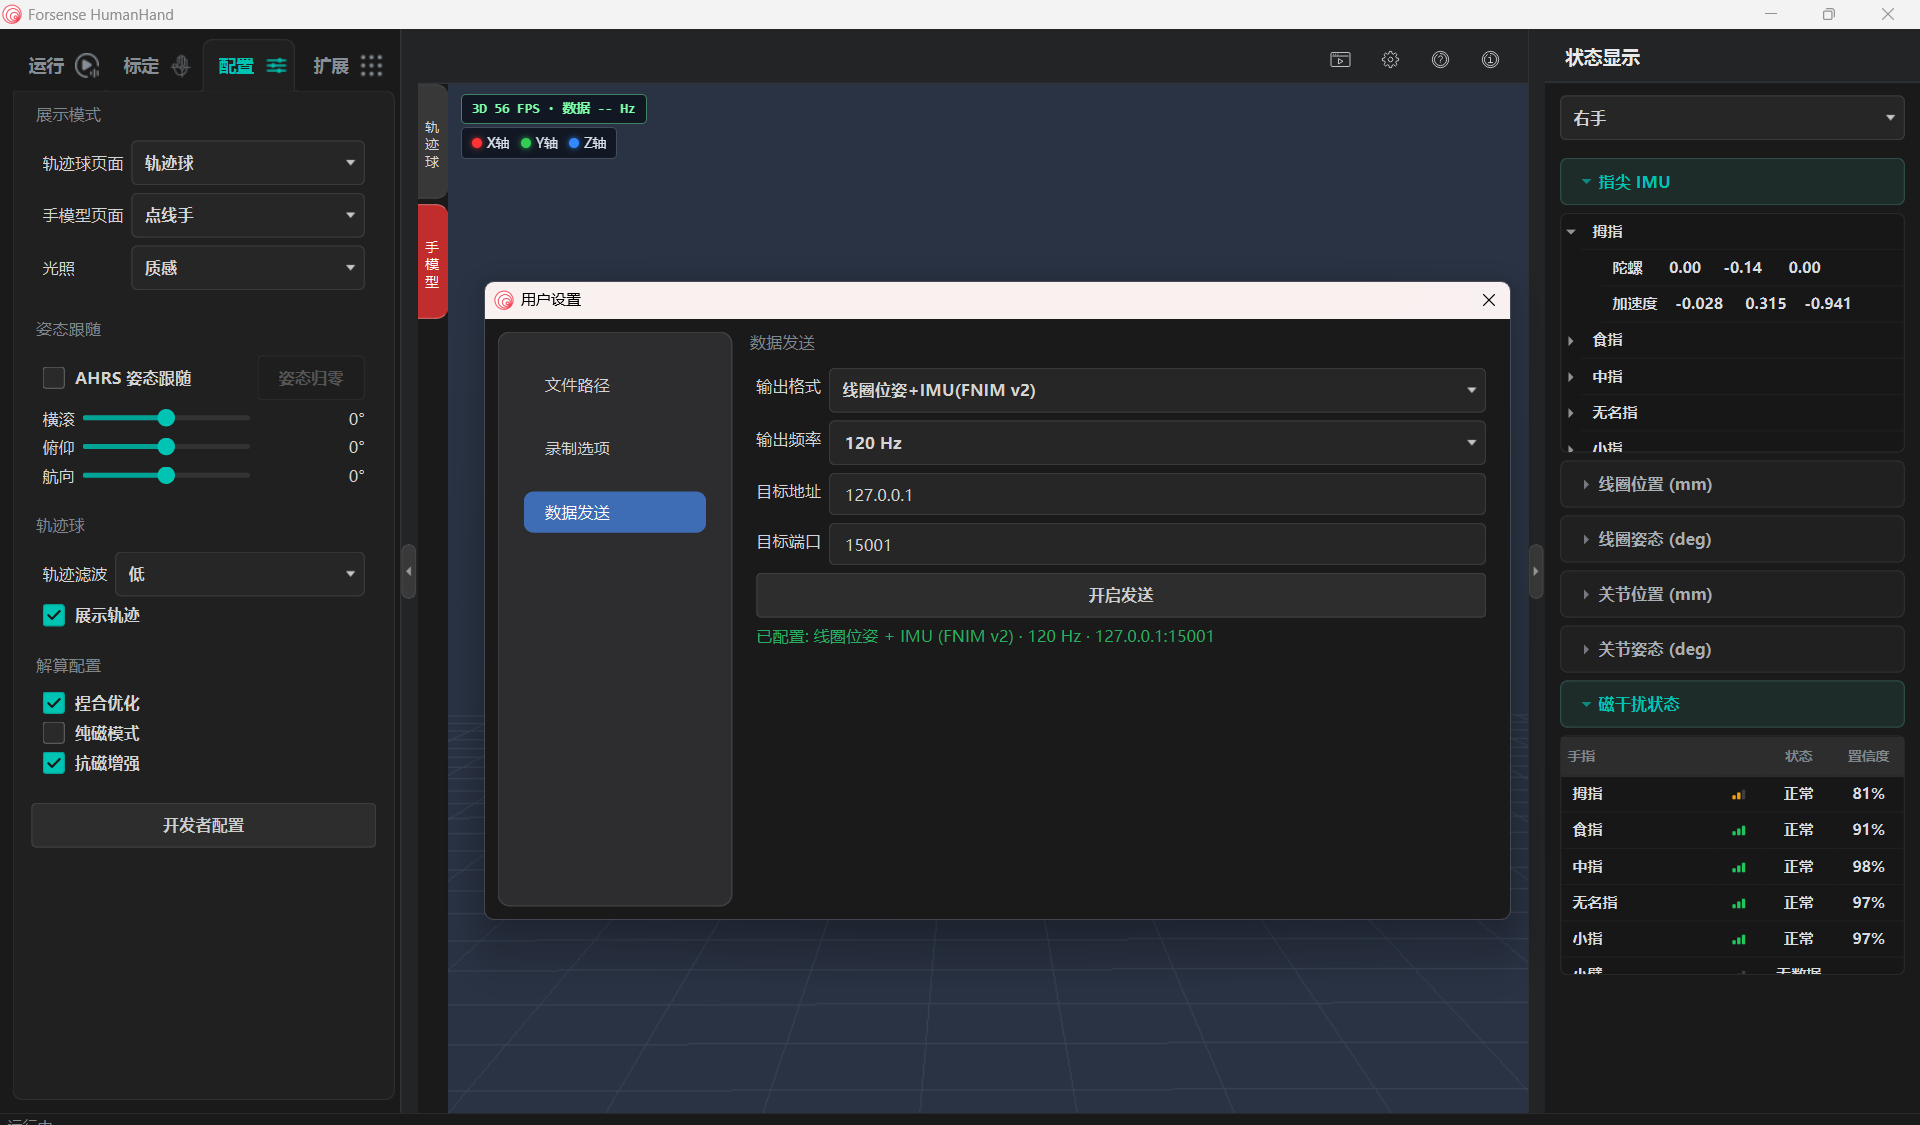
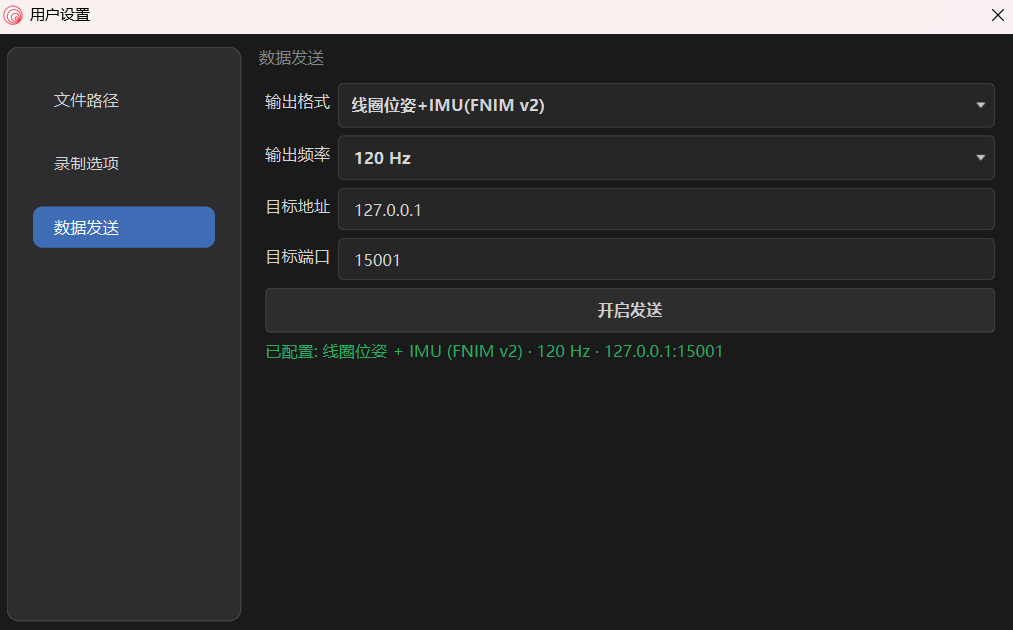
Set destination IP, port, and output format under Data Sending. Joint poses use FSNH version 4 (wrist-relative 612 bytes / 21 joints, forearm-relative 640 bytes / 22 joints; two hands share one port, one packet each); see UDP Reception – Joint Poses. Coil poses use FNIM version 2 (240 bytes); see UDP Reception – EMF Poses.
2.6.4 Help
If you have trouble using the software, use Help to find a solution.
Look up help as follows:
Interface
Click the question-mark icon in the upper-right corner to open the help page in a browser.

2.6.5 About
Click the i icon in the upper-right corner to view the software version, license agreement, and software updates.